Jira Cloud (API token)
Connecting Testiny with Jira Cloud using an API token is a legacy method — we strongly suggest switching to OAuth. New Jira Cloud integrations use OAuth by default. See the Jira Cloud documentation for details.
This page describes the legacy, API-token based connection between Testiny and Jira Cloud, and how to upgrade an existing token-based integration to OAuth.
Switching to OAuth
You can upgrade an existing token-based integration to OAuth in place — the integration’s name, project mapping and all existing issue links are preserved; only the authentication method changes.
To switch an integration to OAuth, you need to have admin rights in Testiny. Go to Settings > Integrations and open the Jira integration you want to migrate. A banner at the top of the panel suggests switching to OAuth:

In order to upgrade:
-
Click
Switch to OAuth. A dialog asks you to confirm: after confirming, the API token is removed from the integration and you need to authorize via OAuth. The API token removal can’t be undone.
-
Click
Continueto confirm. -
In the new settings, review the issue creation options (i.e. allow creating issues using the shared integration account and/or using the user's personal account).
-
Click
Authorize. You are redirected to the Atlassian consent screen — sign in with your Jira account and grant Testiny access to your Jira instance.
After a successful authorization, the integration is shown with type "Jira (OAuth)".
Configuration
New integrations use OAuth by default. On Testiny Server, you can still add token-based Jira integrations — use the "Jira (legacy)" entry in the "Other integrations" section. Otherwise, creating new token-based integrations is no longer supported.
See how to set up a token-based Jira integration:
Or follow these steps:
To configure a new integration, you need to have admin rights in Testiny. Go to Settings > Integrations and click on ' Add integration' for Jira (legacy).
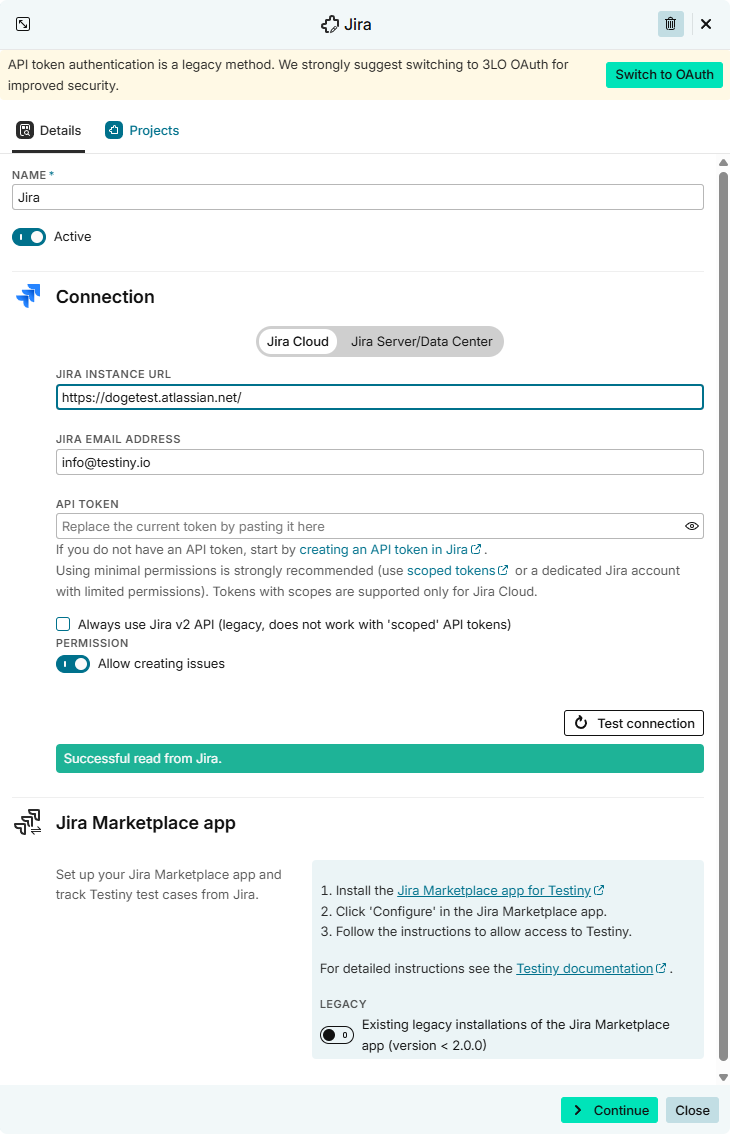
A side panel opens where you need to define the following options for the connection:
Add integration' for Jira (legacy).
A side panel opens where you need to define the following options for the connection:
-
Jira Instance URL
Enter the Jira Instance URL — it usually has the format:https://your_organization.atlassian.net -
Jira Email Address
Testiny connects with Jira using one of the user accounts available in your Jira instance. Please enter the email of the user that you’d like to use for the Testiny connection. -
Jira API token
To increase security, Testiny uses an API token instead of a password to interact with the Jira API.
Please create an API token directly in Jira. Creating an API token is described in detail on this page. Then copy the API token into this input field.You can use granular tokens with specific permissions, but make sure that the token you use has at least the following permissions in Jira:
For linking and looking up issues:
read:project:jira(Scope type Granular)read:jira-work(Scope type Classic)read:jira-user(Scope type Classic)read:board-scope:jira-software(for Agile/SCRUM projects, scope type Granular)read:sprint:jira-software(for Agile/SCRUM projects, scope type Granular)
And for creating issues:
write:jira-work(Scope type Classic)
When the above fields are filled in, click the button "Test connection" to check if the credentials are valid and a connection to Jira can be established.
When you’ve successfully connected Testiny with Jira, you can now also install the Jira Marketplace app for a full two-way integration or skip this step for now and configure which projects you want to connect. To configure the mapping of the projects, click "Continue" or directly go to the "Projects" tab. Here, you can define the scope of the integration for:
-
Testiny Projects
-
All projects
By default, the integration is configured for all existing and future projects of your Testiny organization.
You can also choose whether to use this integration for defects only, requirements only, or both.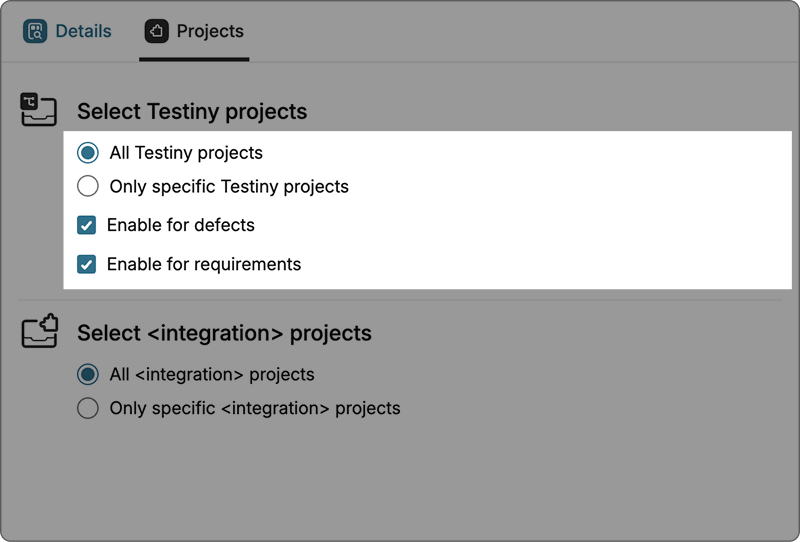
-
Only specific projects If you want to configure an integration for specific Testiny projects only, select this option. Now you can select for which projects you want to enable this integration.
You can also choose whether to use this integration for defects only, requirements only, or both.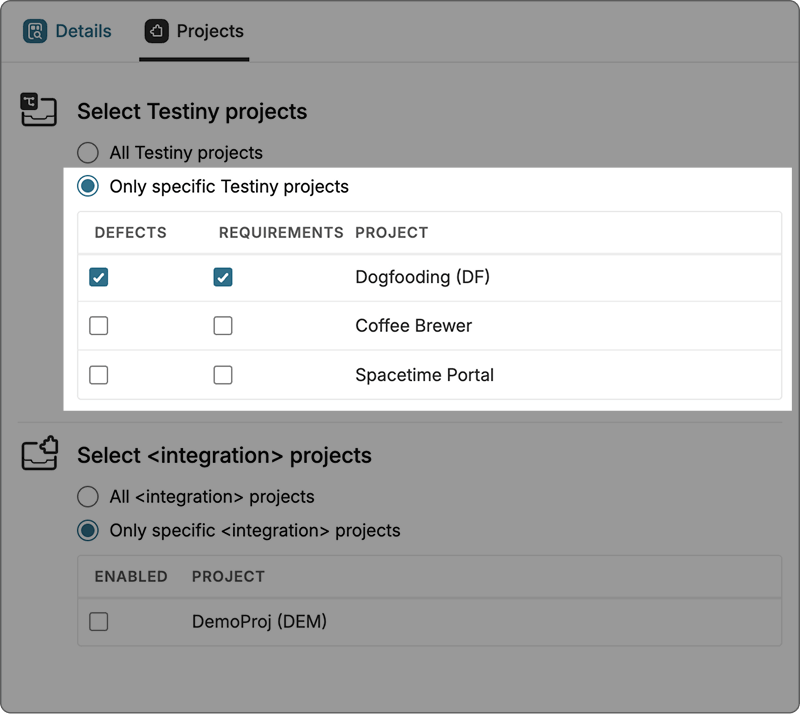
-
-
Jira Projects
-
All projects
By default, the integration is configured for all projects.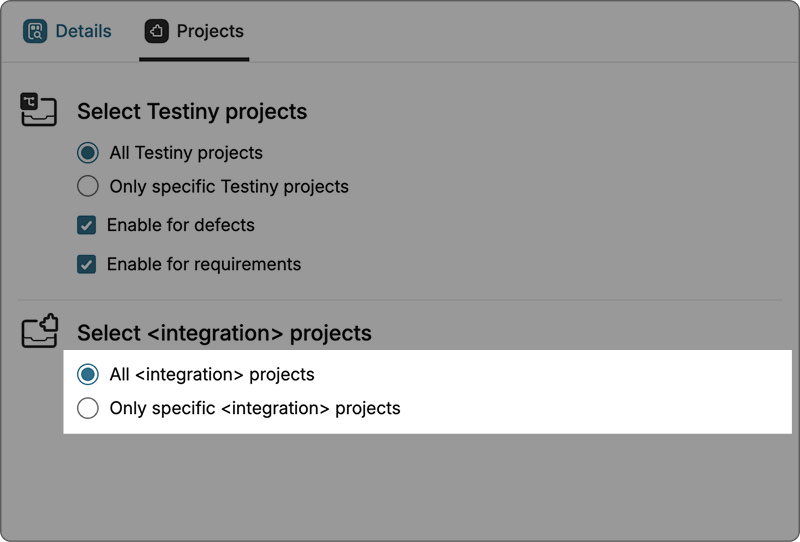
-
Only specific projects
If you want to configure an integration for specific projects only, select this option. Now you can select which projects you want to enable this integration for.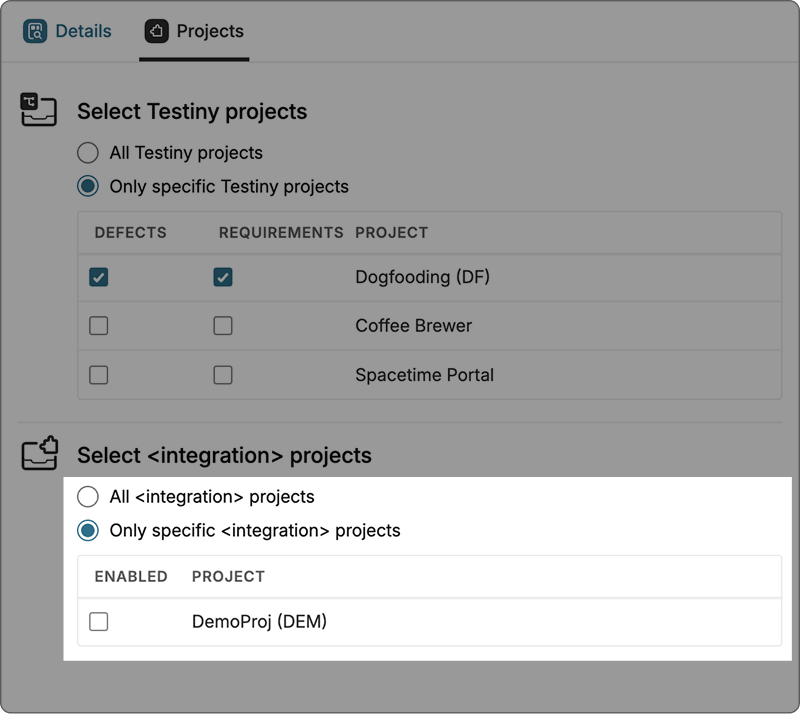
-
Using the Jira Integration
Working with a token-based Jira integration is identical to an OAuth-based one — see using the Jira Integration and installing the Jira Marketplace app. The only difference is the account used to interact with Jira: with an API token, all lookups and issue creation are performed in the context of the Jira user the token belongs to.