Jira Server + Data-Center
Use Testiny as your Jira test management tool and connect test cases and results to Jira Issues. Testiny fully integrates into Jira Server/Jira Data-Center. You can create, link and look up issues, requirements or defects from Testiny. You are also able to view linked testing activities directly from Jira — a fully fledged two-way integration. Testiny further makes complex issue-type configuration (with all its custom fields etc.) unnecessary; Testiny reads your issue-configurations and performs the whole configuration in the background. Just link Testiny with your Jira Server or Data-Center — and you’re done!
Configuration
To configure a new integration, you need to have admin rights in Testiny.
- Go to Settings > Integrations.
- Click on '
Add integration' for Jira. A side panel opens where you need to define the following options for the connection:
-
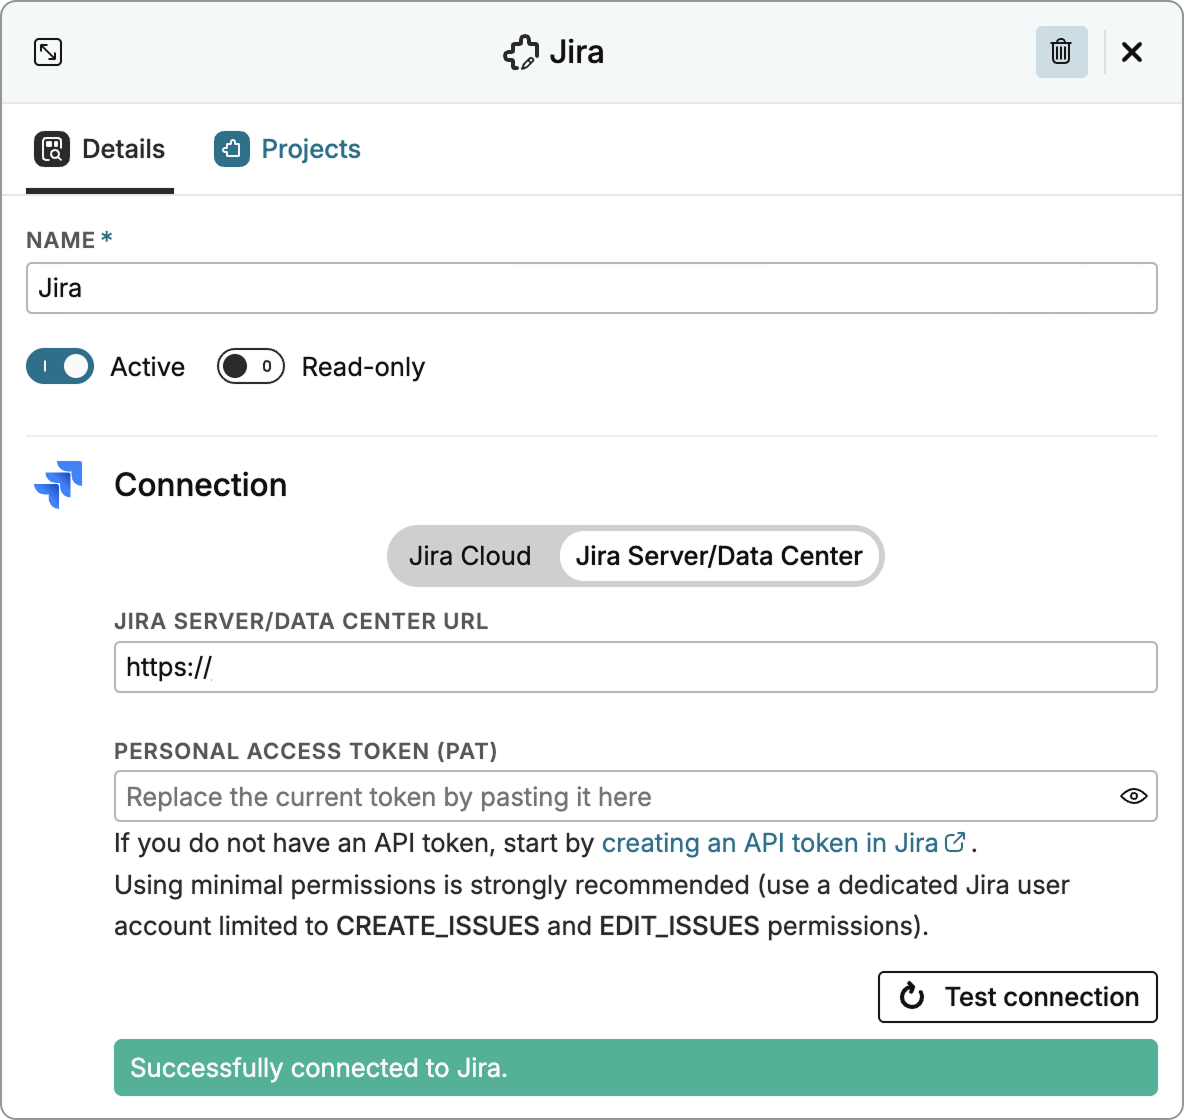
Switch to "Jira Server/Data Center"
-
Jira Server URL
Enter the Jira server URL. The Jira server/data center must be reachable from the internet for Testiny Cloud, or from your Testiny Server instance — please configure your firewall accordingly. -
Personal Access Token (PAT)
Create a personal access token for your Jira Server (how to create an API token is described on this page) and copy it into this field.
- Click the button "Test connection" to check if the credentials are valid and a connection to Jira can be established.
- When you’ve successfully connected Testiny with Jira, you can now configure the mapping of the projects. Go to the "Projects" tab to define the scope of the integration:
-
Testiny Projects
-
All projects
By default, the integration is configured for all existing and future projects of your Testiny organization.
You can also choose whether to use this integration for defects only, requirements only, or both.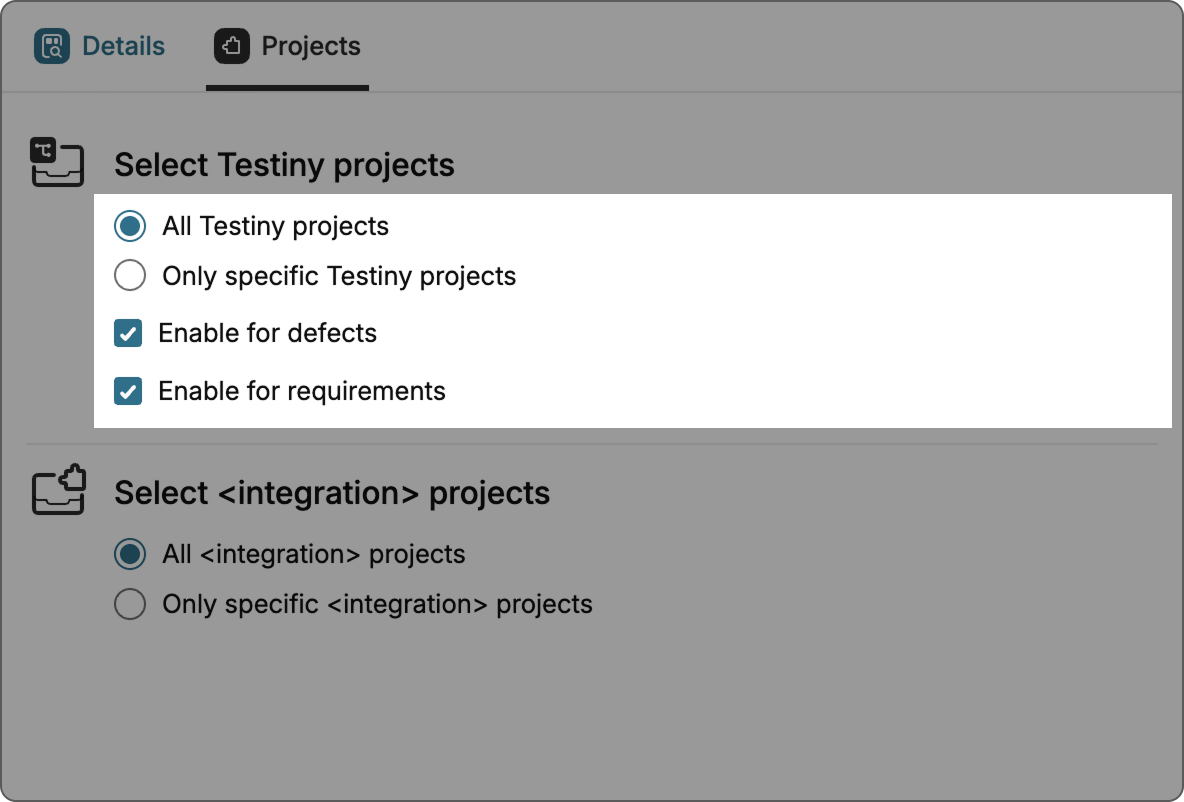
-
Only specific projects If you want to configure an integration for specific Testiny projects only, select this option. Now you can select for which projects you want to enable this integration.
You can also choose whether to use this integration for defects only, requirements only, or both.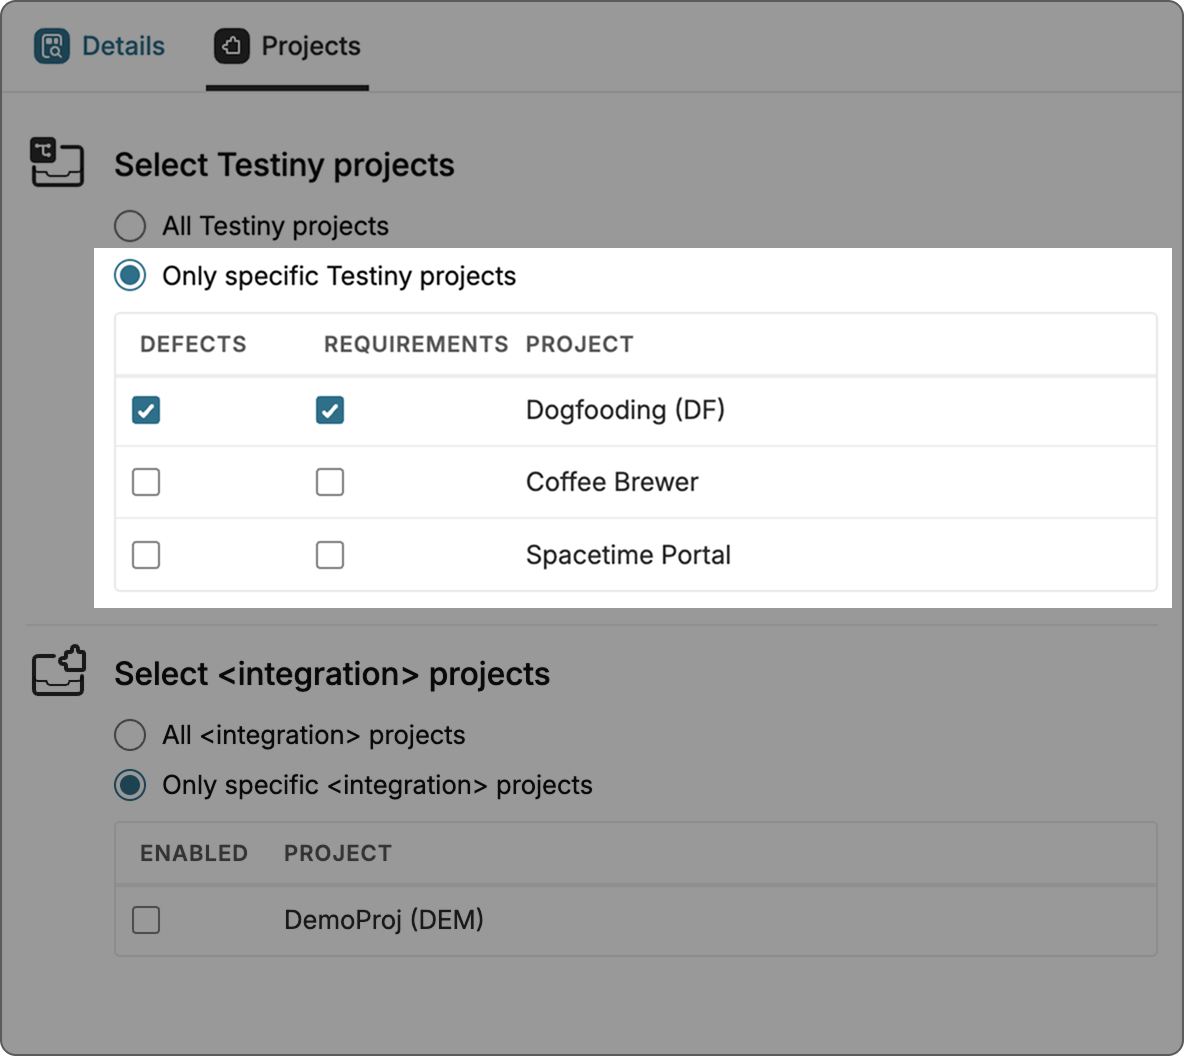
-
-
Jira Projects
-
All projects
By default, the integration is configured for all projects.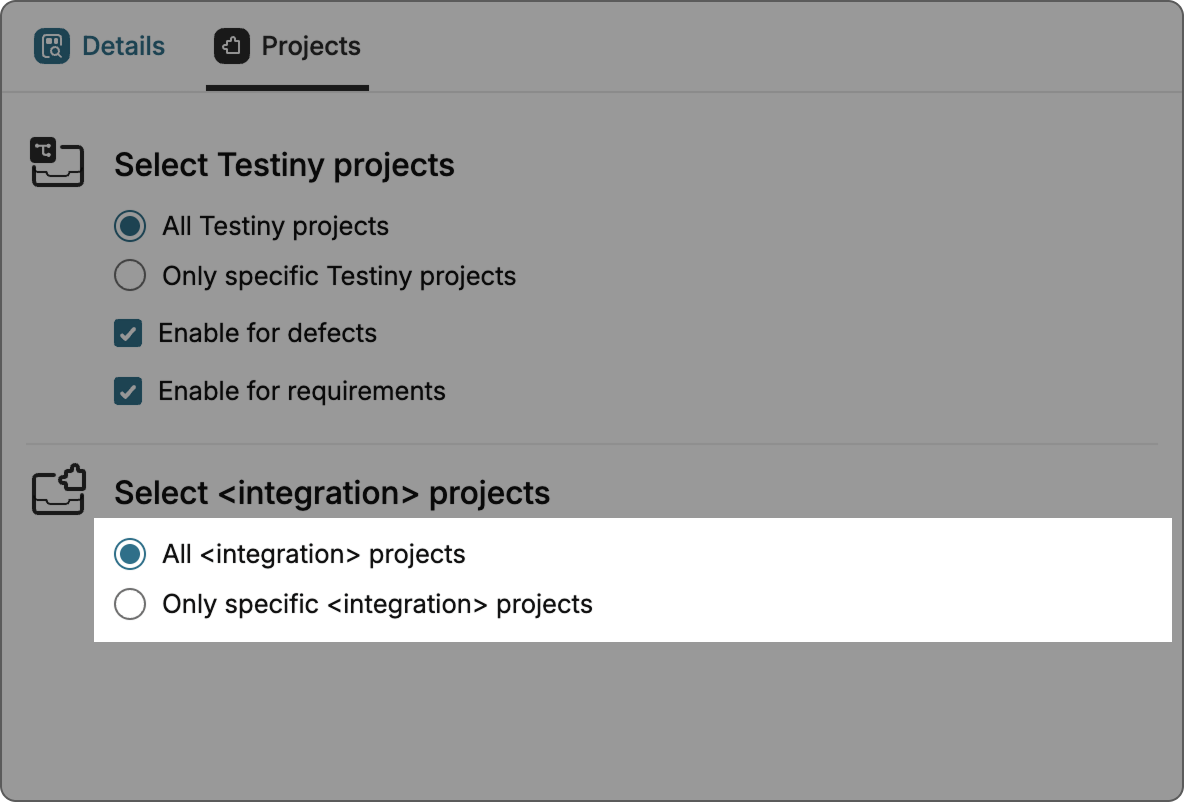
-
Only specific projects
If you want to configure an integration for specific projects only, select this option. Now you can select which projects you want to enable this integration for.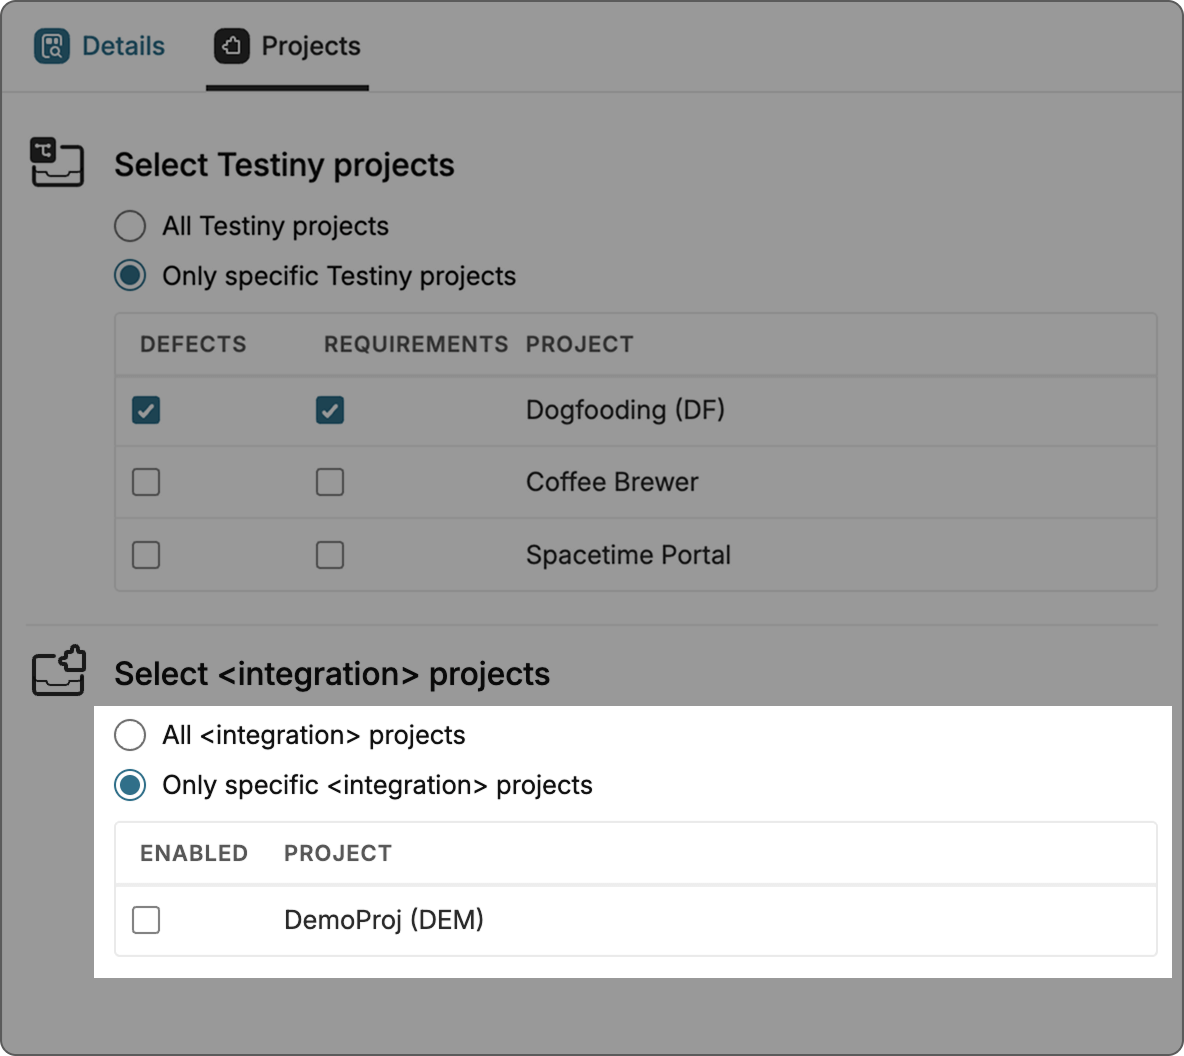
-
Jira add-on
The Jira Data Center add-on is only available for Testiny Server.
For a full bi-directional integration, install the Jira add-on on the official Atlassian Marketplace. It enables backward linking from Jira to Testiny and you’re able to view testing activities done in Testiny directly within Jira — e.g. see which requirements in Jira are covered by which test cases or which bugs are linked to a certain test-run.
You need admin rights in Jira to install the Jira add-on from the Atlassian marketplace.
Configuration:
-
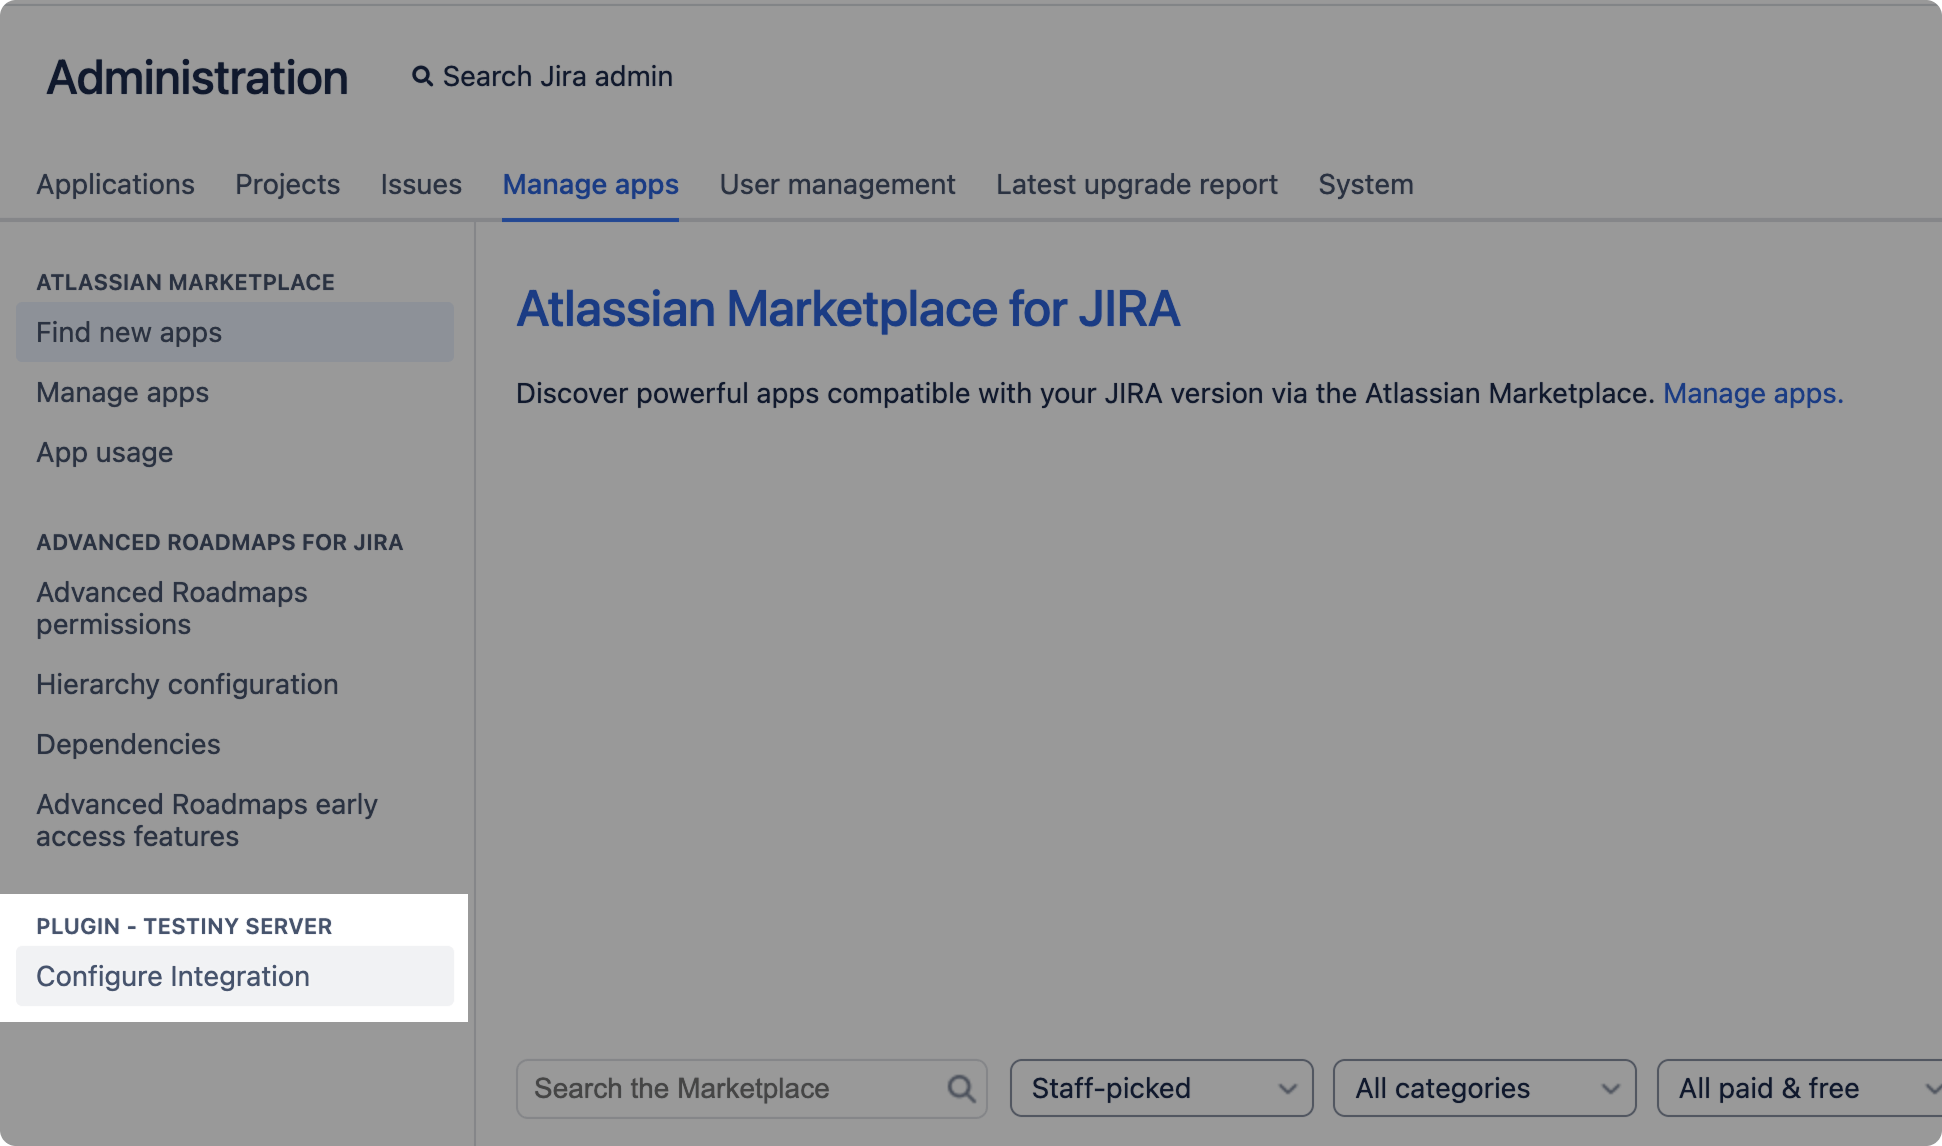
Install the app from the official Atlassian marketplace. You can also navigate in Jira to Apps > Find new apps and search for "Testiny".
-
After installing the app, select "Configure Integration" for the Testiny Server Plugin.
-
In this dialog, set the Testiny Server URL and click "Save".
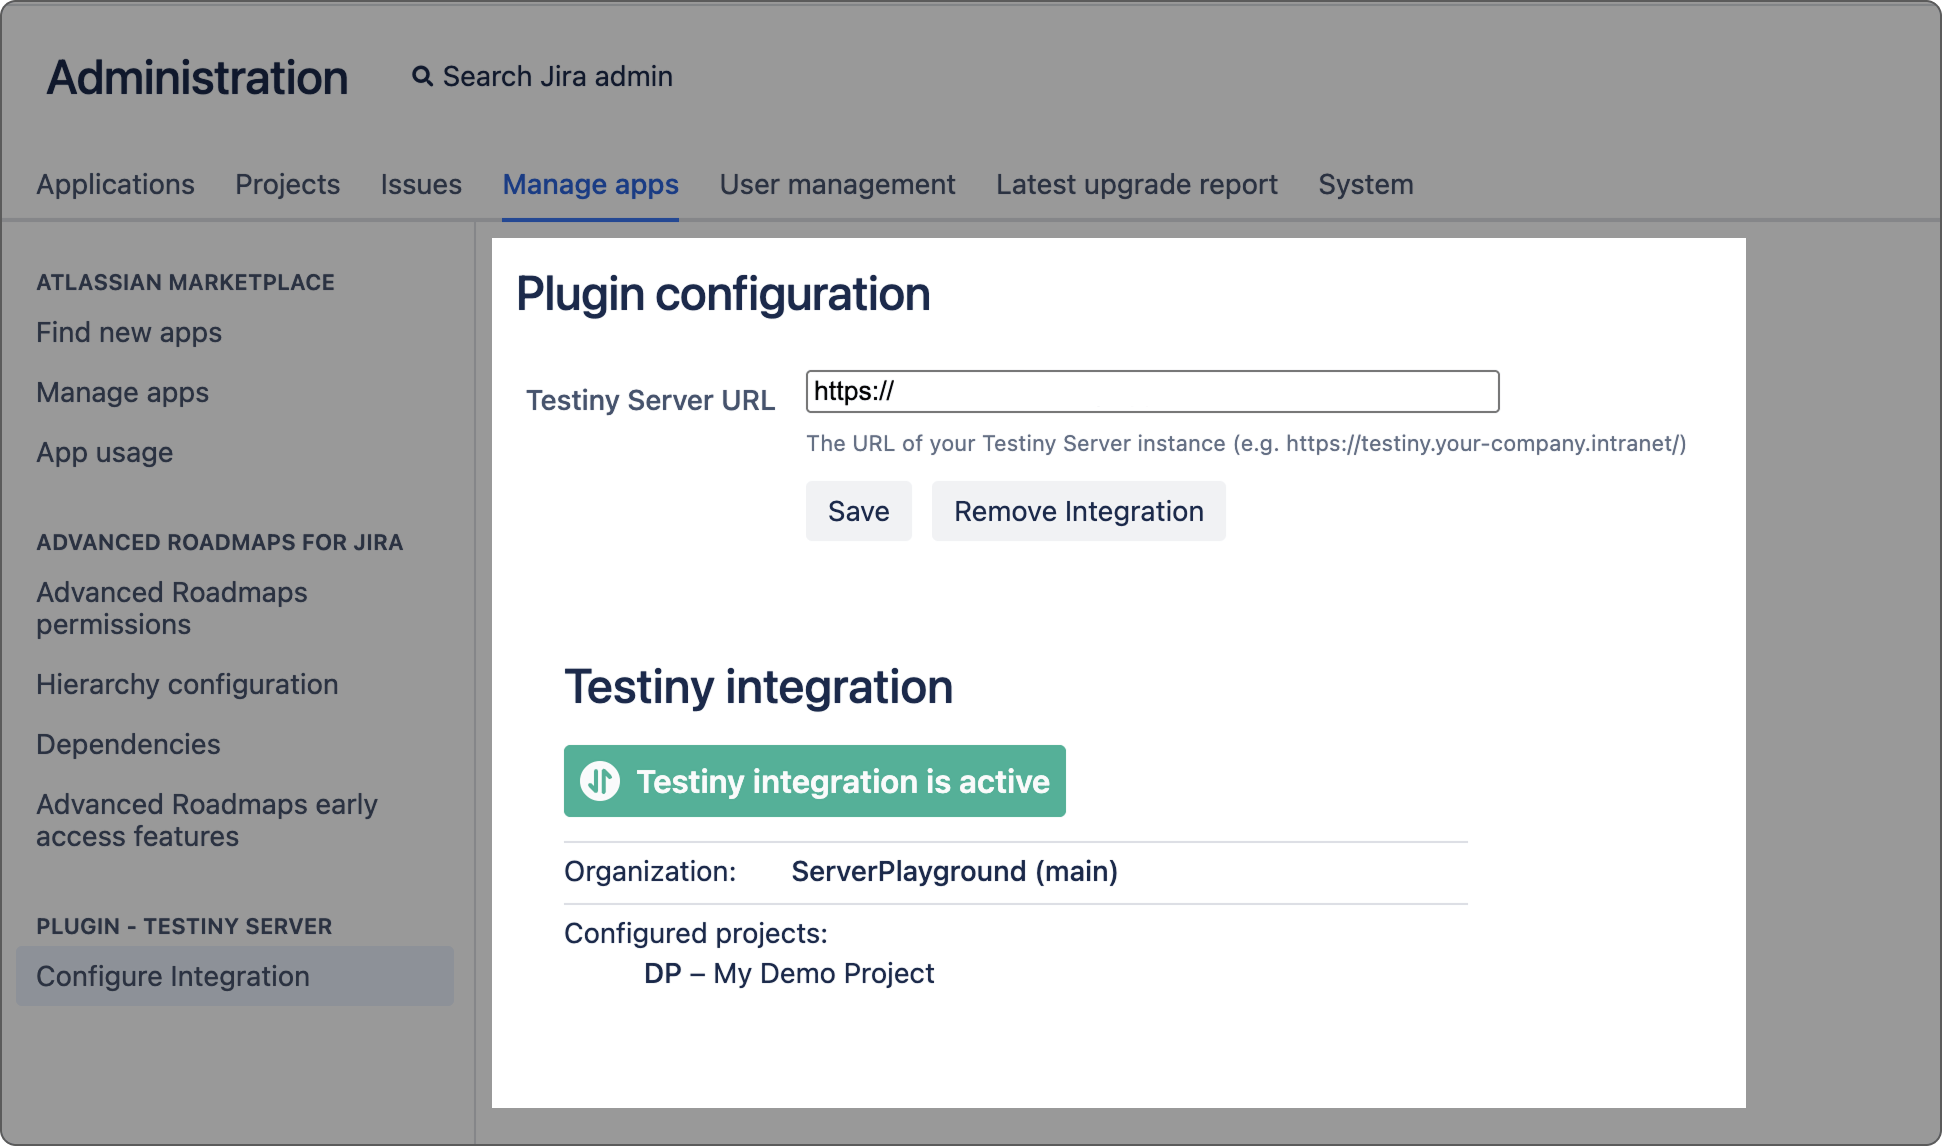
Then you’ve successfully connected your Jira instance with Testiny. From now on, you’re able to view testing activities also within Jira issues.
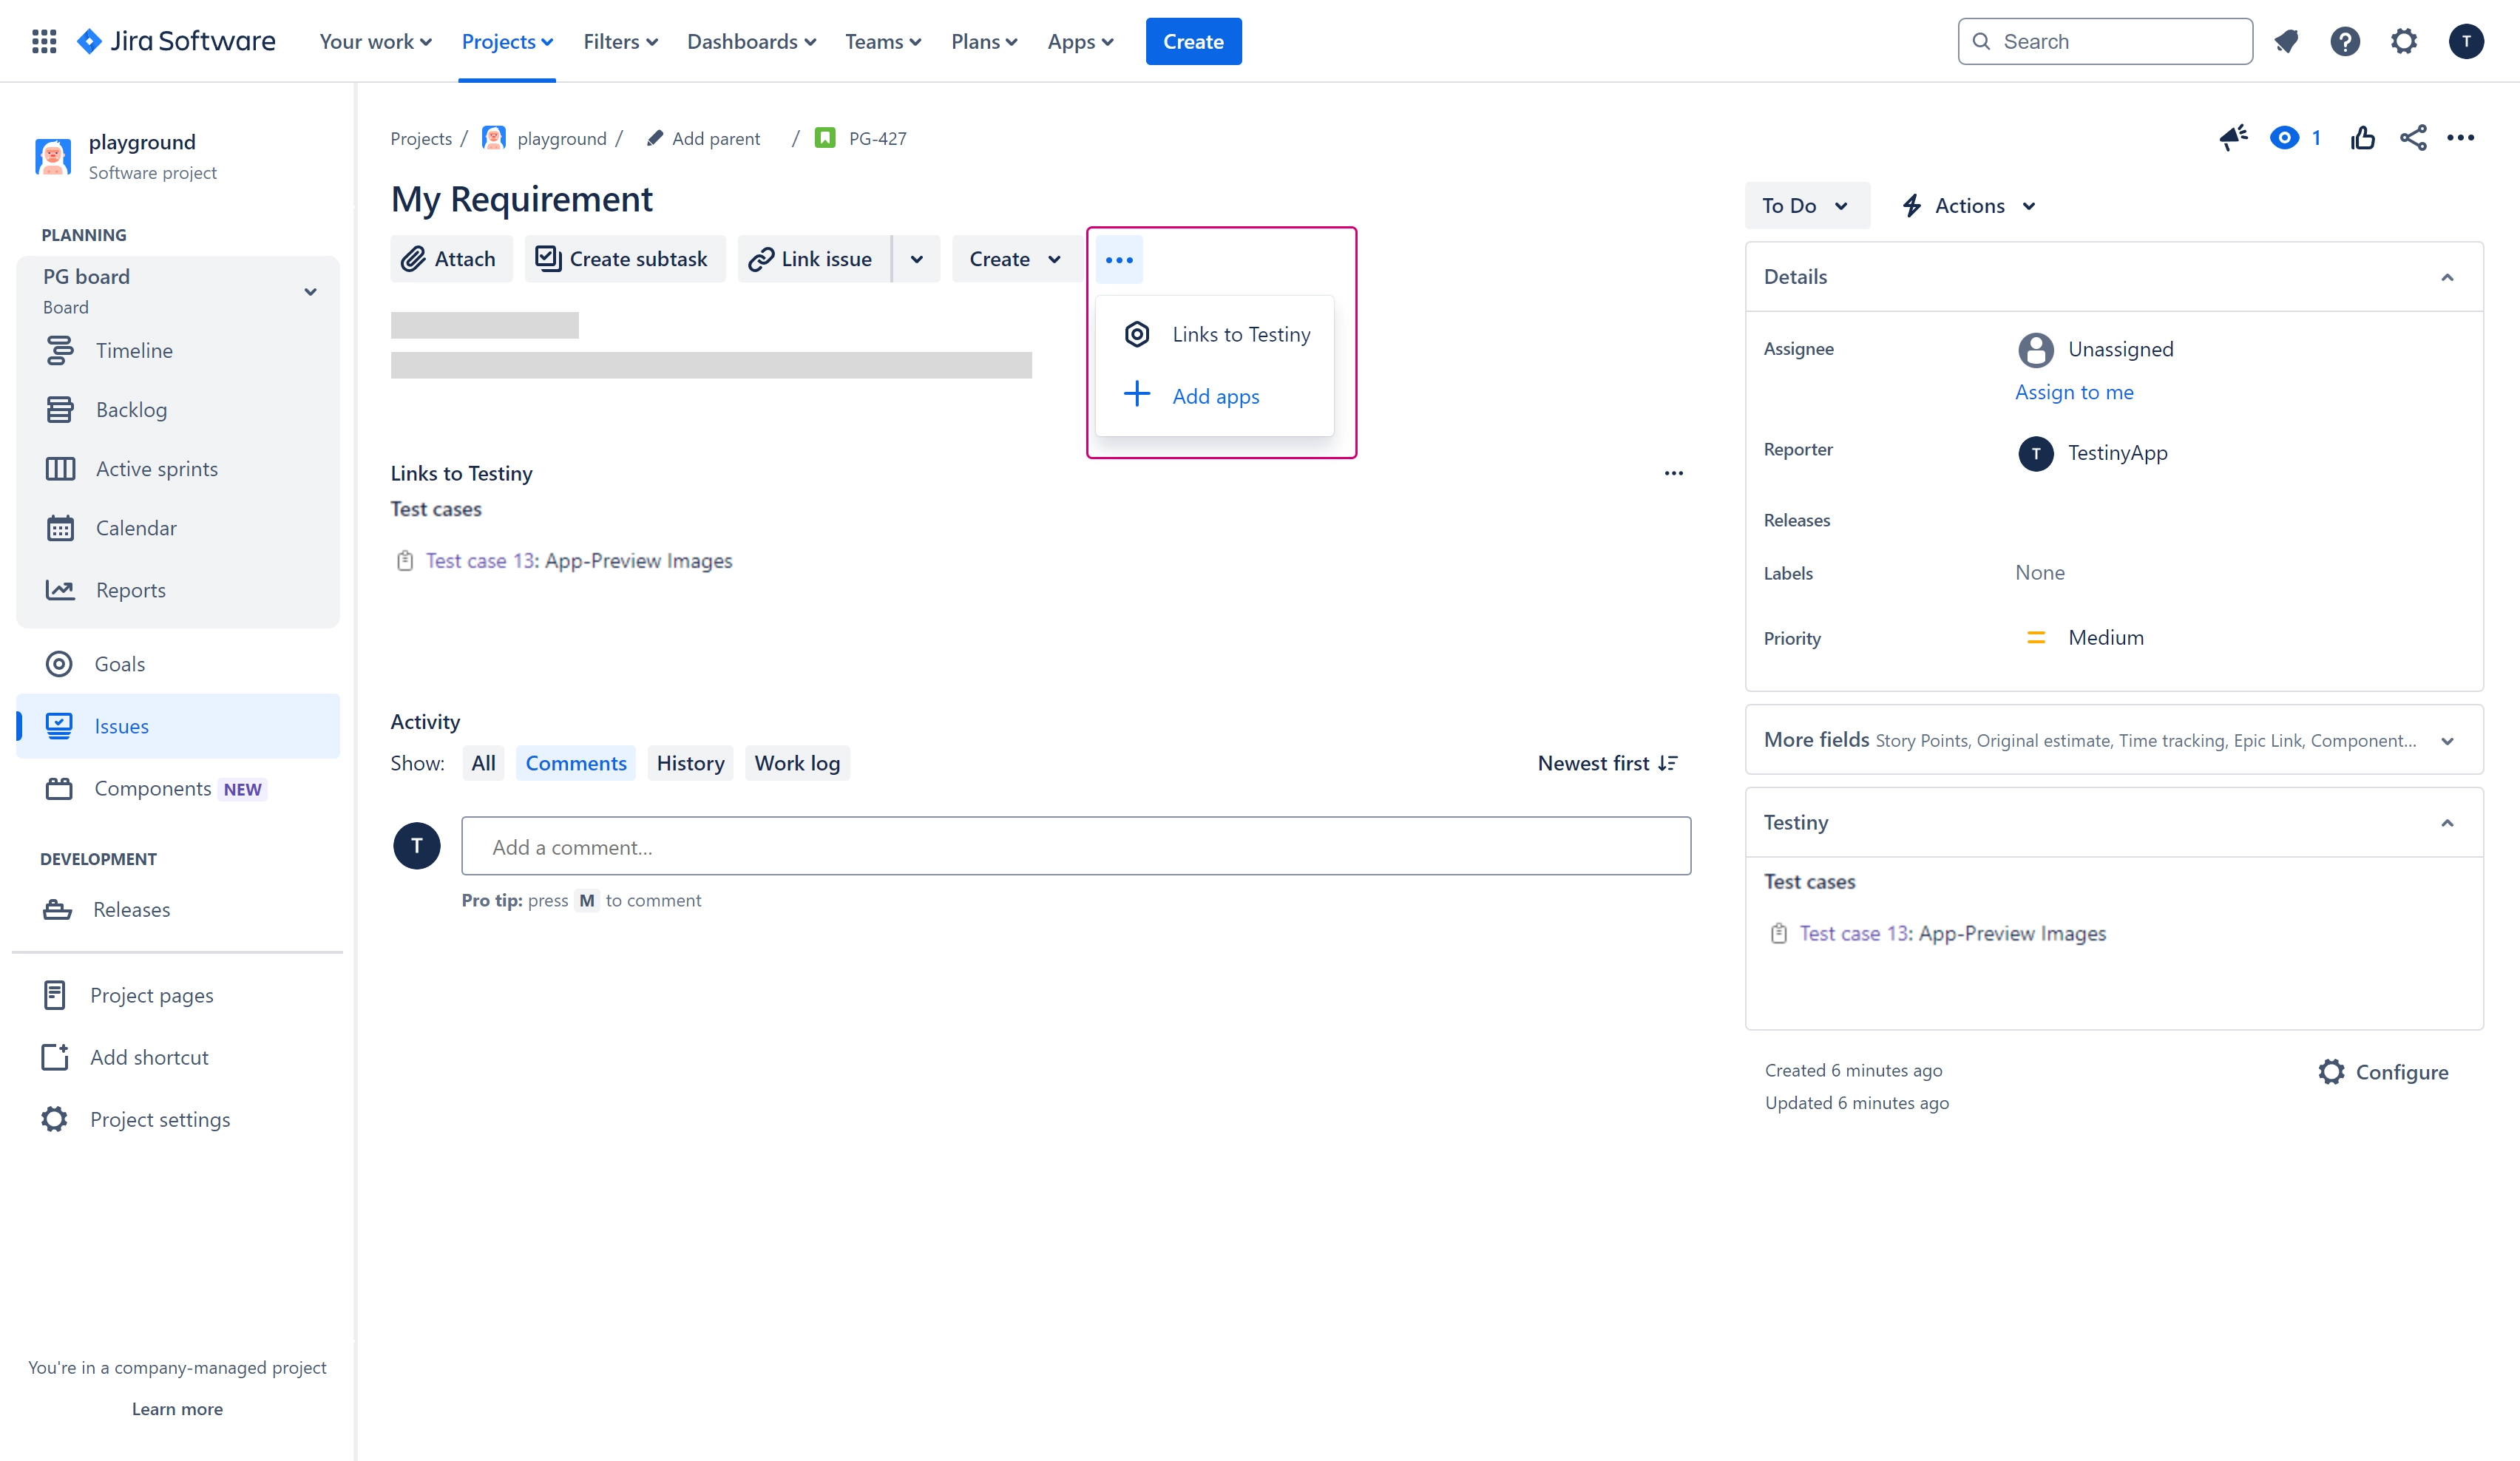
If you want to see linked test cases and runs directly in your Jira issues, you can enable the inline view by going to the menu and clicking "Links to Testiny".
Using the Jira Integration
The integration with Jira allows users to create and link issues in Jira from Testiny. Issues can be created or linked to test cases, test runs and test results and can be viewed in Testiny.
Creating or linking Jira Issues
Within Testiny, you can link test runs and executions to Jira issues. If you find a bug during your tests, you can create an issue in Jira directly from Testiny. It is also possible to link requirements in Jira to test cases or create requirements in Jira directly from Testiny to build up your test coverage matrix.
Jira issues can be created (or linked to) in Testiny from the following entities:
-
Test cases
It is possible to link requirements to test cases (a requirement can be any type of Jira issue) or to create a requirement that is automatically linked to the test case. -
Test runs and test executions
Testiny provides the ability to create defects (or link an existing issue) directly from a test run or a test execution.
When creating a requirement or a defect from Testiny, a create dialog will open where you can set the fields for the Jira issue. In this dialog you can select the Jira project, the issue type and set any other fields that may be required. Click "Create" to confirm. If pop-ups are allowed, the newly created issue will open in a new browser tab. Otherwise, a small window with the details and a link to the issue will appear.
When linking a requirement or a defect, a search dialog will open where you can search all existing issues directly in Testiny (no need to switch to Jira) and select the issue you want to link.
Accessing Jira Issues in Testiny
Connecting Jira with Testiny allows you to directly look up and access Jira issues.
Testiny shows essential information such as the issue status or the issue type inline.
Essential information like the issue title or issue status is synchronized into Testiny.
This means that even if the integration is unavailable, Testiny remains unaffected and will still display the synchronized data.
For further details on linked issues, the issue can be opened directly from Testiny by clicking the issue ID. Testiny supports issue links in various places:
- Test cases
- Test runs
- Test results
If you have any further questions or need to get assistance, please do not hesitate to ask in the forum. Our support team is always available to assist you.
Jira Cloud
Testiny also supports an integration with Jira Cloud. Please have a look at the Jira Cloud documentation.