Salesforce
Testiny can be configured to use Salesforce as your identity provider for single sign-on (SSO). Testiny supports configuring both SSO and email login, or restricting logins by requiring SSO logins. This guide explains how to configure the Salesforce integration using the OpenID Connect protocol.
Configuring SSO
To configure SSO with Salesforce, you first need to create a web app integration in Salesforce and then configure Salesforce as the SSO provider in Testiny.
Configuration in Salesforce
If you've already created an OAuth client for Testiny in Salesforce, then you can skip this section and continue configuring SSO in Testiny.
-
Go to your Salesforce account, open the side menu and choose
Apps > App Manager(1). Then (2), click onNew Connected App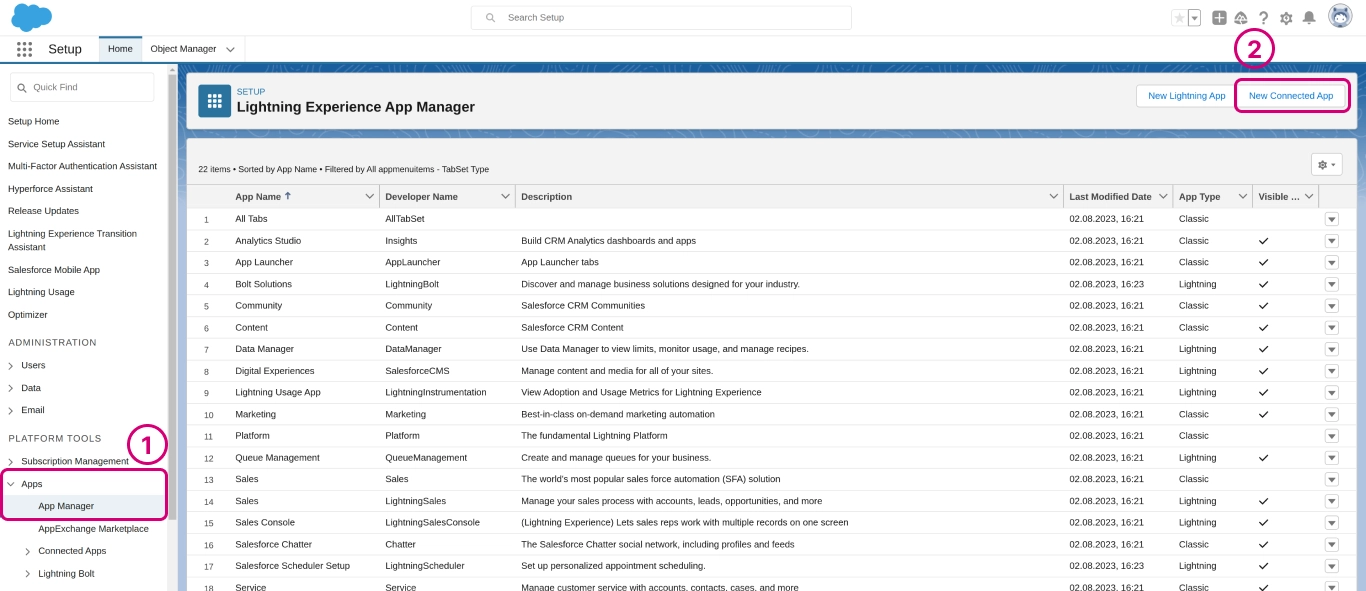
-
In (1), define the app name, i.e. 'Testiny' and a contact email of your company in case users have questions about this app.
In (2), you can optionally upload the Testiny logo. You can download the Testiny logo here.
In (3), check the boxEnable OAuth Settings.
In (4), add the following URL as an allowed callback URL:
https://app.testiny.io/api/v1/oauth/redirect
In (5), you need to select the following OAuth scopes and add them with the add button (6):Access the identity URL serviceAccess unique user identifiersPerform requests at any time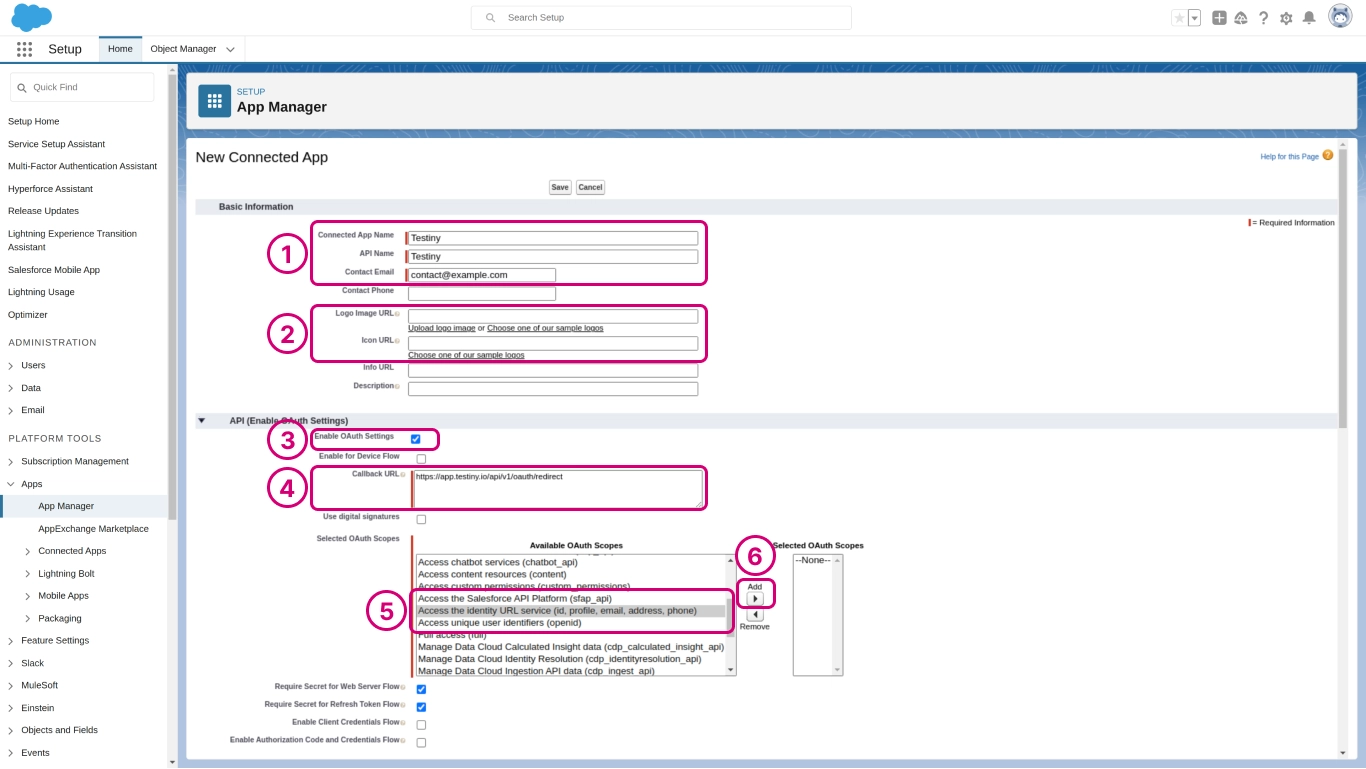
-
Make sure that you've added all three OAuth scopes as shown in (1).
In (2), check the boxConfigure ID Token.
In (3), check the boxInclude Standard Claims.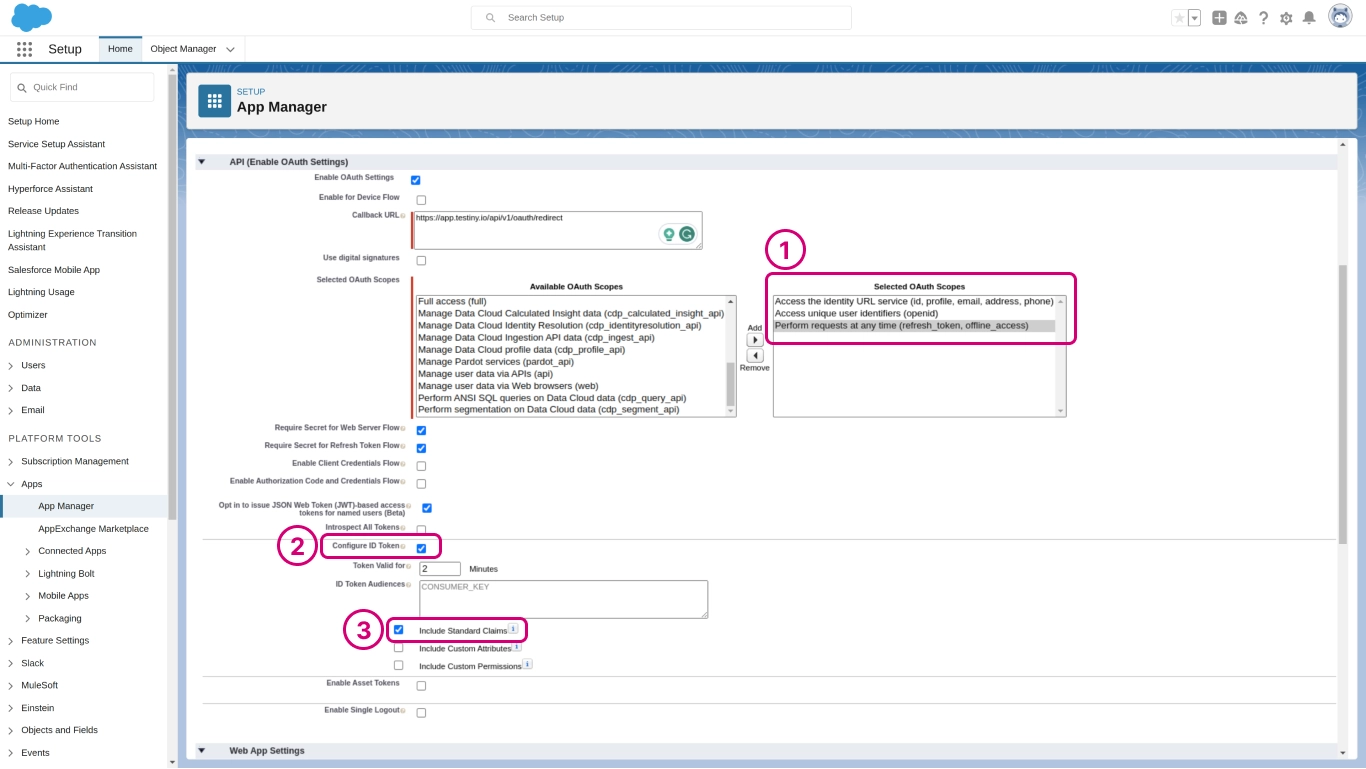
-
Then scroll down and click
Save.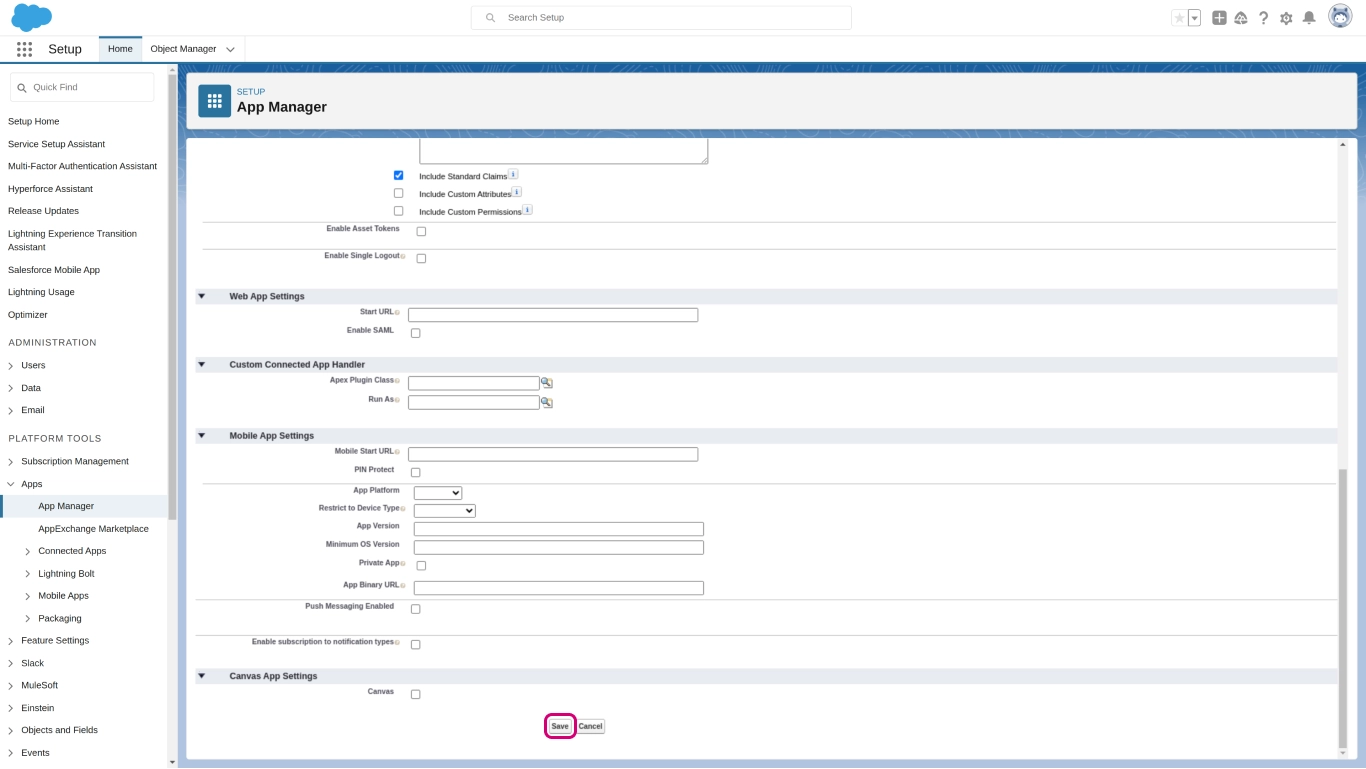
-
In the list of apps, you should now see the newly created app. If not, please wait and refresh as changes in salesforce can take up to 10 minutes to take effect. Then click on the menu button on the right and select
View.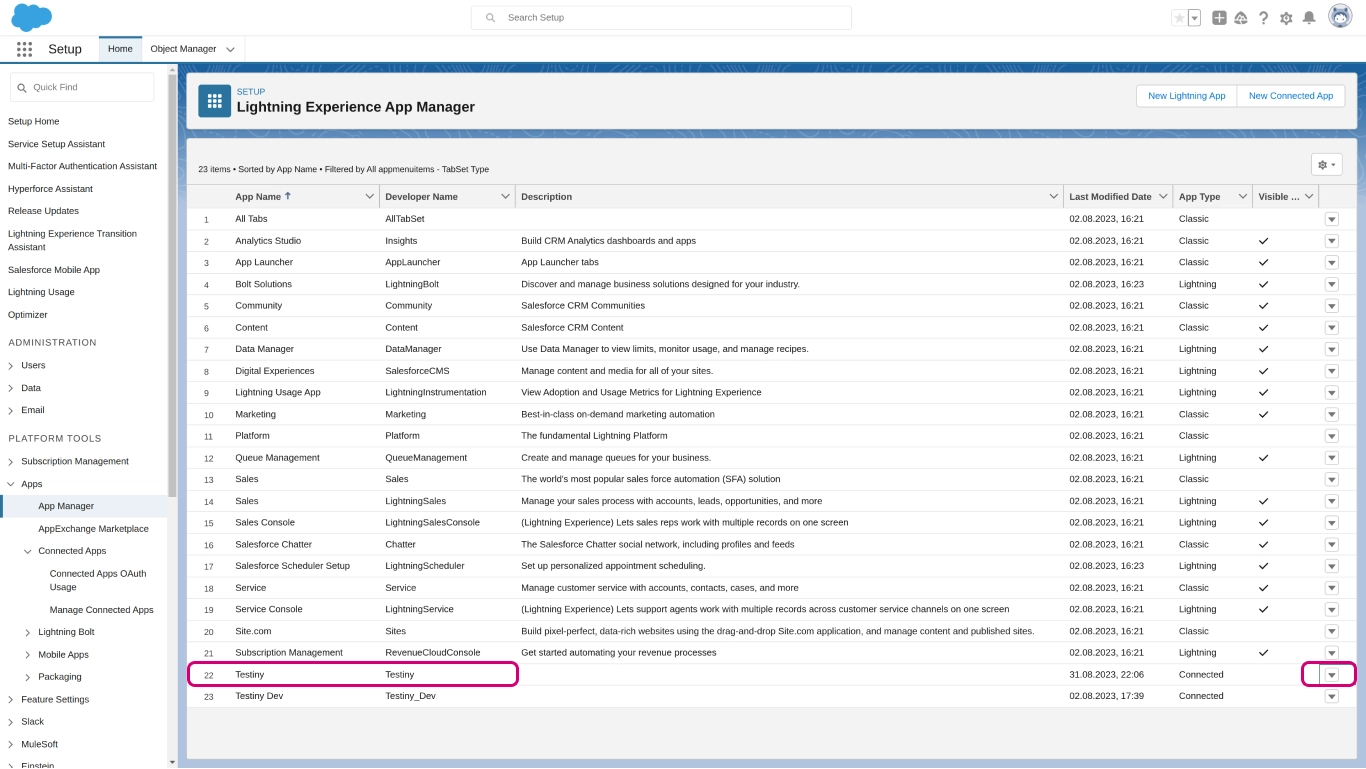
-
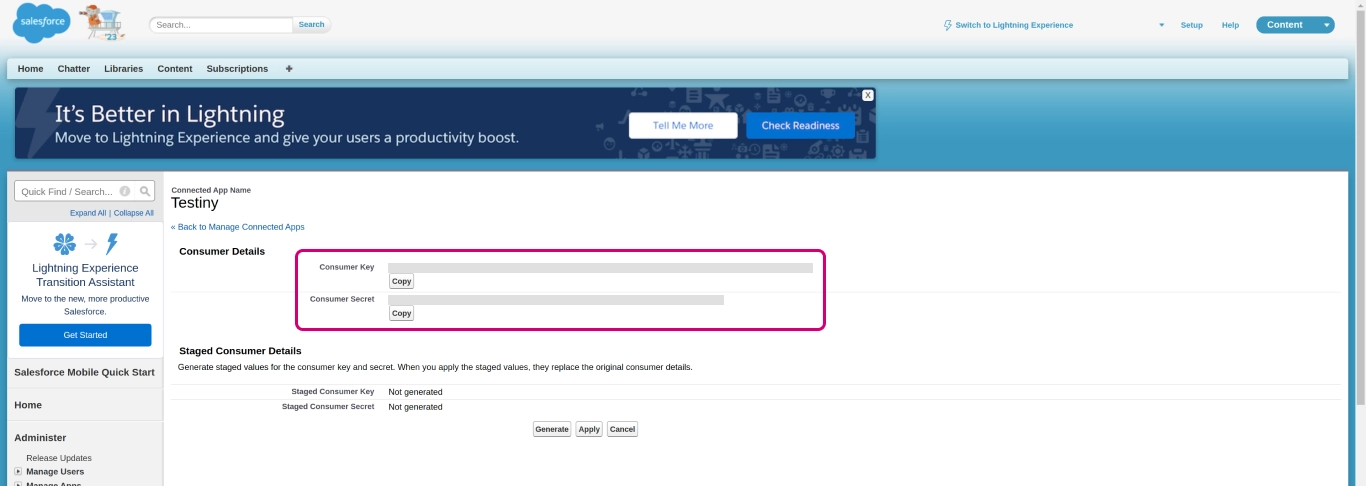
In the app view, click
Manage Consumer Details.
-
In this view, please note that you'll need the consumer key/client ID and consumer/client secret in the next step when configuring SSO in Testiny.
Configuration in Testiny
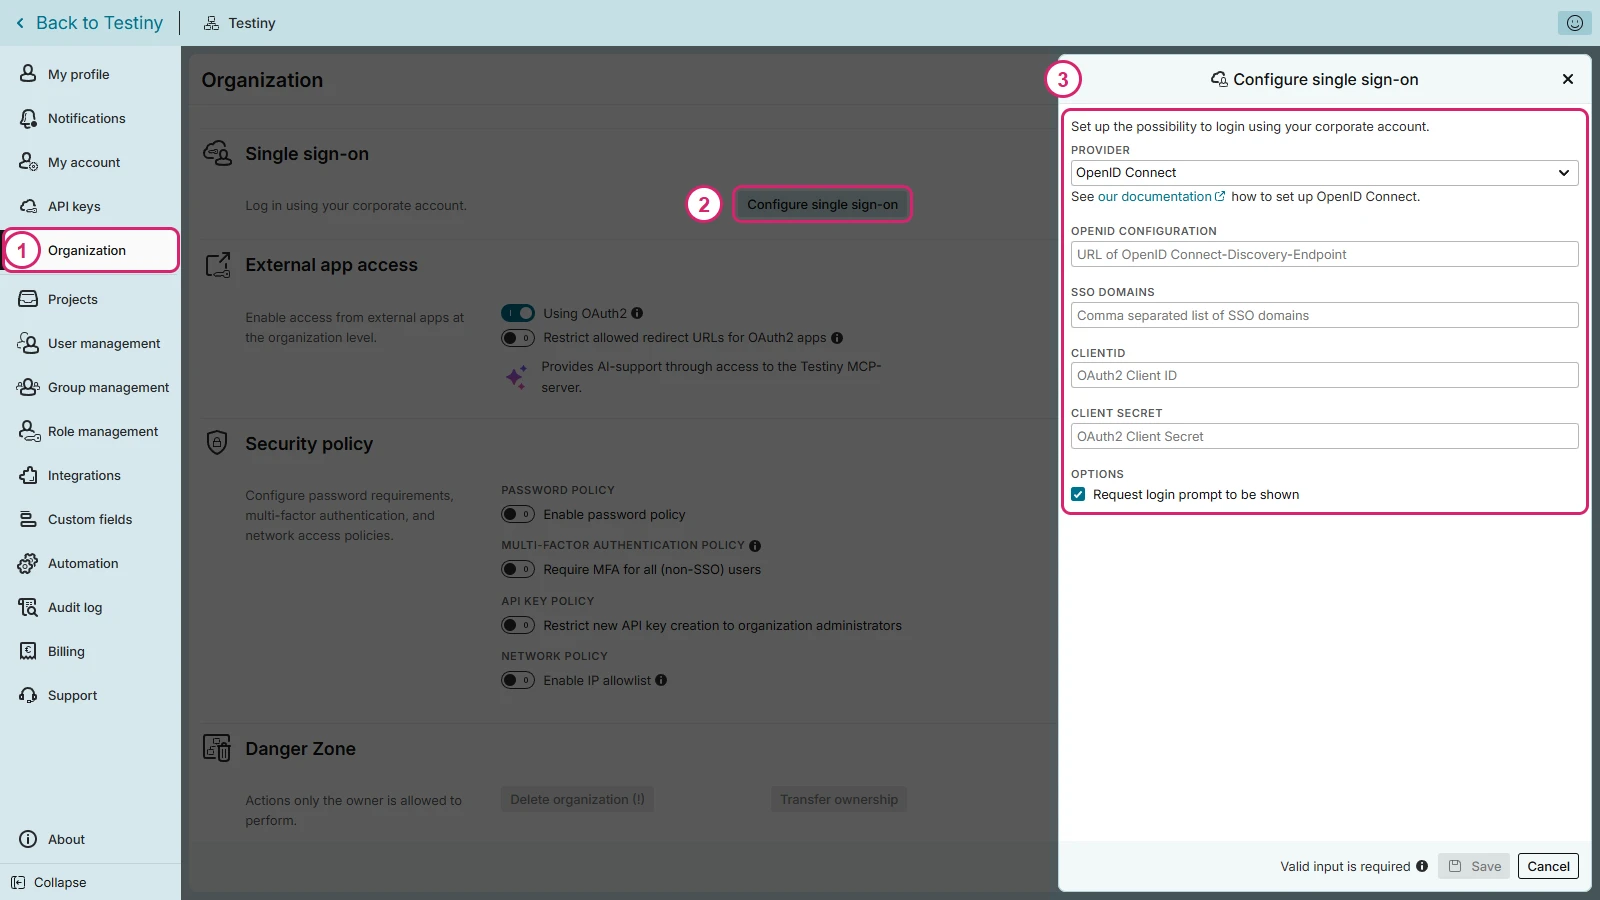
To configure Salesforce as your SSO provider, you need to have admin rights in Testiny. In Testiny, go to the settings and select Organization (1), as shown in the screenshot below. Click on 'Configure single sign-on' (2). A side panel (3) opens where you need to define the following options:
- Provider — Choose 'Salesforce' from the list.
- OpenID Configuration — Specify the URL to the OpenID Connect metadata. In Salesforce, the URL should look like the following example:
https://((instance)).my.salesforce.com/.well-known/openid-configuration
In this template, replace ((instance)) with the domain name of your Salesforce account. You can also follow the Salesforce documentation on how to create this URL. - SSO Domains — Enter the domains that will be able to use single sign-on.
3.1 If you have already invited users from these domains to your Testiny organization, an option will show up to change the login type of these users. By default, the users' login type will be set to "SSO allowed". - Client ID — Enter the client ID of the client created in Salesforce. You can copy the ID from your app client as described above in the last step in the section on how to configure an app client in Salesforce.
- Client Secret — Enter the client secret of the client created in Salesforce. You can copy the secret from your app client as described above in the last step in the section on how to configure an app client in Salesforce.
- Click on "Save". Once SSO is successfully configured, you can invite SSO users to your organization or update existing users to use SSO login in the user management settings.
To invite users to your organization, navigate to Settings > User management and click the "Invite" button in the top left corner. A side panel will appear, where you can choose whether the SSO login is allowed, required or disabled:
- allowed — the user can log in via SSO, but can also create a password in Testiny and use the email login
- required — the user must log in via SSO
- disabled — the user cannot log in via SSO, only with email login
Then, enter the email address of the user to be added and optionally the first and last name. In the "Role" drop-down, you can adjust the user’s permissions. Learn more about the user management in Testiny.
Logging into Testiny
When SSO is configured in your Testiny organization and the user is invited as an SSO user, they can simply log in to Testiny on the login page. When SSO is required, the user can only log in with SSO. If SSO is allowed but not required, the user might also log in via email and password.
Please note that the owner of the organization in Testiny cannot be restricted to require SSO login so that the owner can always log in with email & password.
Disabling SSO
To disable SSO, go to Settings > Organization and click the ![]() next to the configured provider. A dialog will be shown to see which users are affected and cannot log in via SSO anymore. After confirming, SSO is disabled and you continue using email/password login or set up a new SSO provider.
next to the configured provider. A dialog will be shown to see which users are affected and cannot log in via SSO anymore. After confirming, SSO is disabled and you continue using email/password login or set up a new SSO provider.
Changing your SSO provider
If you want to modify your SSO configuration or change to another SSO provider, simply click the "Configure single sign-on" button to open the configuration side panel. You can change the SSO provider and set up a new SSO configuration, or add new SSO domains to your current configuration. If you remove an SSO domain, single sign-on may be deactivated for users in this SSO domain.