Testiny MCP Server
The Testiny MCP (Model Context Protocol) Server enables AI tools like Claude Desktop, VS Code with Copilot, and other MCP-compatible applications to interact directly with your Testiny project data. This allows AI assistants to create and read test cases, create test runs, update test results, and manage your testing workflow seamlessly.
Setup
To use the Testiny MCP server, you'll need to configure it with your Testiny credentials and add it to your AI tool's MCP configuration.
Prerequisites
- A Testiny account with API access
- A Testiny paid or trial plan
- An optional API key from your Testiny API Keys settings
- If no API key is used, the Authorization header is not needed and OAuth will be used instead
Configuration Examples
Here are examples of how to configure the MCP server with specific clients. You can use the MCP server with any MCP compatible client (protocol '2025-06-18').
- VS Code with Copilot
- Claude (Desktop)
Configure the Testiny MCP server in your VS Code settings mcp.json or workspace configuration:
{
  "servers": [
    {
      "name": "testiny",
      "url": "https://app.testiny.io/api/v1/mcp-server",
      "headers": {
        "Authorization": "Bearer your-api-key-here"
      }
    }
  ]
}
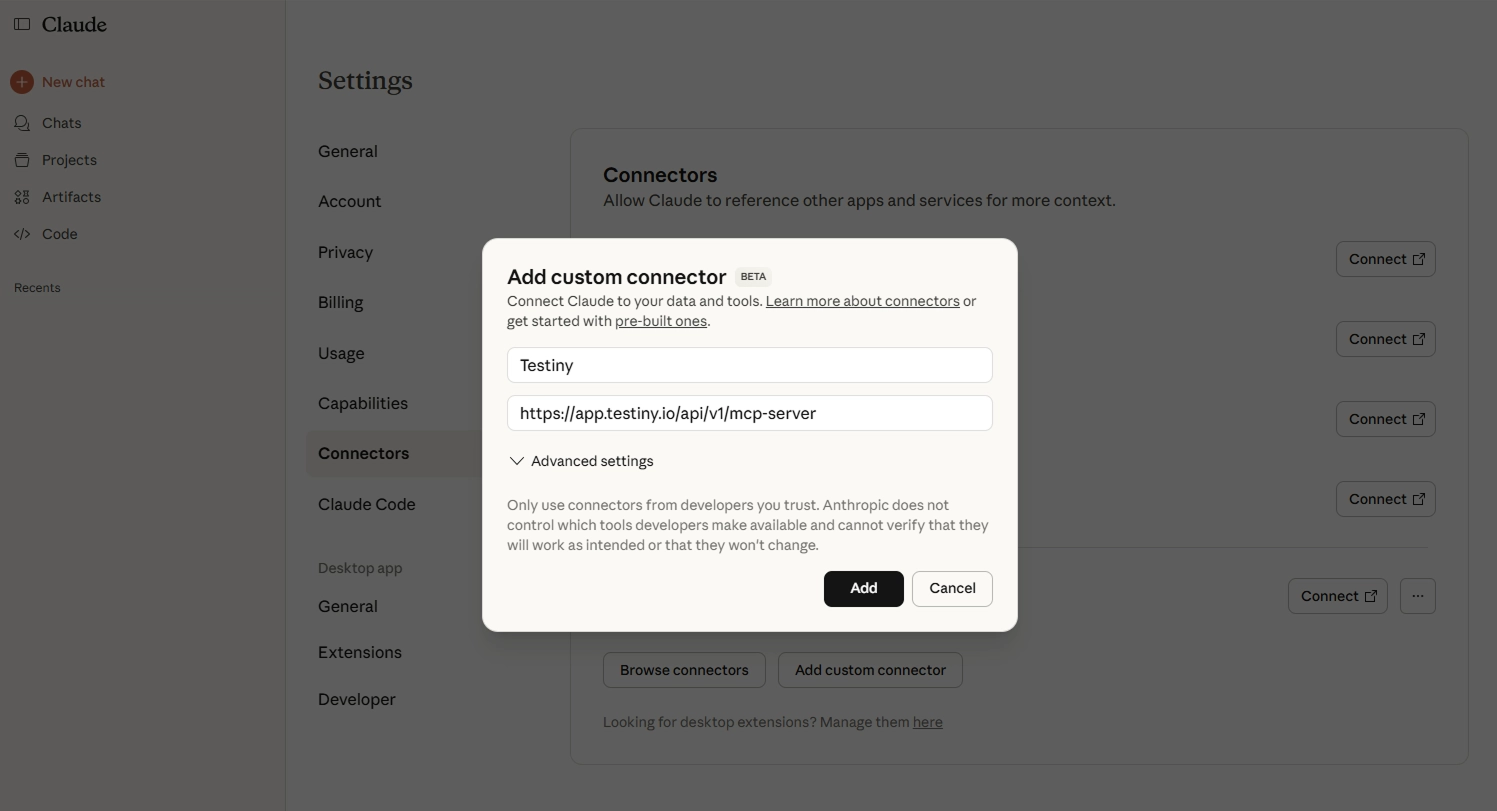
Add the Testiny MCP Server as a custom connector to Claude and connect via OAuth using Url https://app.testiny.io/api/v1/mcp-server:
Treat your API key like a password and keep it secure. The API key inherits the same permissions as the user who created it. Consider creating dedicated API keys with limited project access for MCP server usage.
Available Tools
The Testiny MCP server provides the following tools for AI assistants to interact with your Testiny data:
Project Management
listProjects- Retrieve all accessible Testiny projectslistTestCaseFolders- Browse test case folder structure within projectslistTestCases- Get test cases with optional keyword filteringlistTestRuns- Get test runs with optional keyword filtering
Test Case Creation
createTestCase- Create test cases (in a folder) with a precondition, steps, expected results and custom fields
Test Execution
createTestRun- Create new test runs for organizing test executionsetTestResult- Update test case results (passed, failed, blocked, skipped)getTestStatus- Check current test case status for one or all test cases within a test runaddTestResultComment- Add detailed comments to test results
Usage Examples
Assisted Test Automation Integration
You can ask your AI assistant to help automate test result reporting:
"Create a new test run called 'Sprint 24 Regression Tests' in the Mobile App project and execute the test case TC-123"
The AI assistant will:
- Find the Mobile App project using
listProjects - Create the test run using
createTestRun - Try to execute the steps in the specified test case
- Update the test result using
setTestResult - Add comments using
addTestResultComment
Always include enough context information for the assistant to be able to use e.g. a browser MCP server with URLs and test logins.
Code Generation Example
Generate test automation code based on your Testiny test cases:
"Generate Selenium WebDriver test code for test case TC-456 in Java."
The AI assistant will:
- Retrieve the test case details using
listTestCases - Analyze the test steps and expected results
- Generate appropriate automation code
- Suggest how to integrate with your test reporting using
setTestResult
Include information about specific libraries, code style and existing test structure like page objects in your prompt.
Troubleshooting
If you encounter issues with the MCP server:
- Verify API Key: When using an API key, ensure your API key is valid and has appropriate permissions
- Ensure OAuth enabled: Ensure that OAuth is enabled in your Testiny organization settings
- MCP feature available: Make sure you have a paid Testiny plan or are in the trial phase
- Check Base URL: Confirm the base URL matches your Testiny instance (Cloud vs Server)
- Project Access: Verify the API key's user has access to the projects you're trying to access
For additional support or feature requests, please contact our support team as explained here.
Related Documentation
- API Quickstart Guide - Learn about the underlying REST API
- API Keys Management - How to create and manage API keys
- Test Automation - Integrate with CI/CD pipelines
- CLI Tool - Alternative command-line interface for automation