API Keys
The API keys section allows you to create, modify or delete your API keys, which you need to interact with the Testiny API or to use the Testiny CLI Importer to report automated test results.
API keys are tied to user accounts to process all sent requests under that user's context. This allows granular control, monitor API requests per user and revoke API keys without affecting other users.
As an administrator, restrict the creation of API keys in the organization settings.
Creating API keys
API keys are always issued to the user account that created them. That means, the API key has always (at maximum) the permissions of the user themselves.
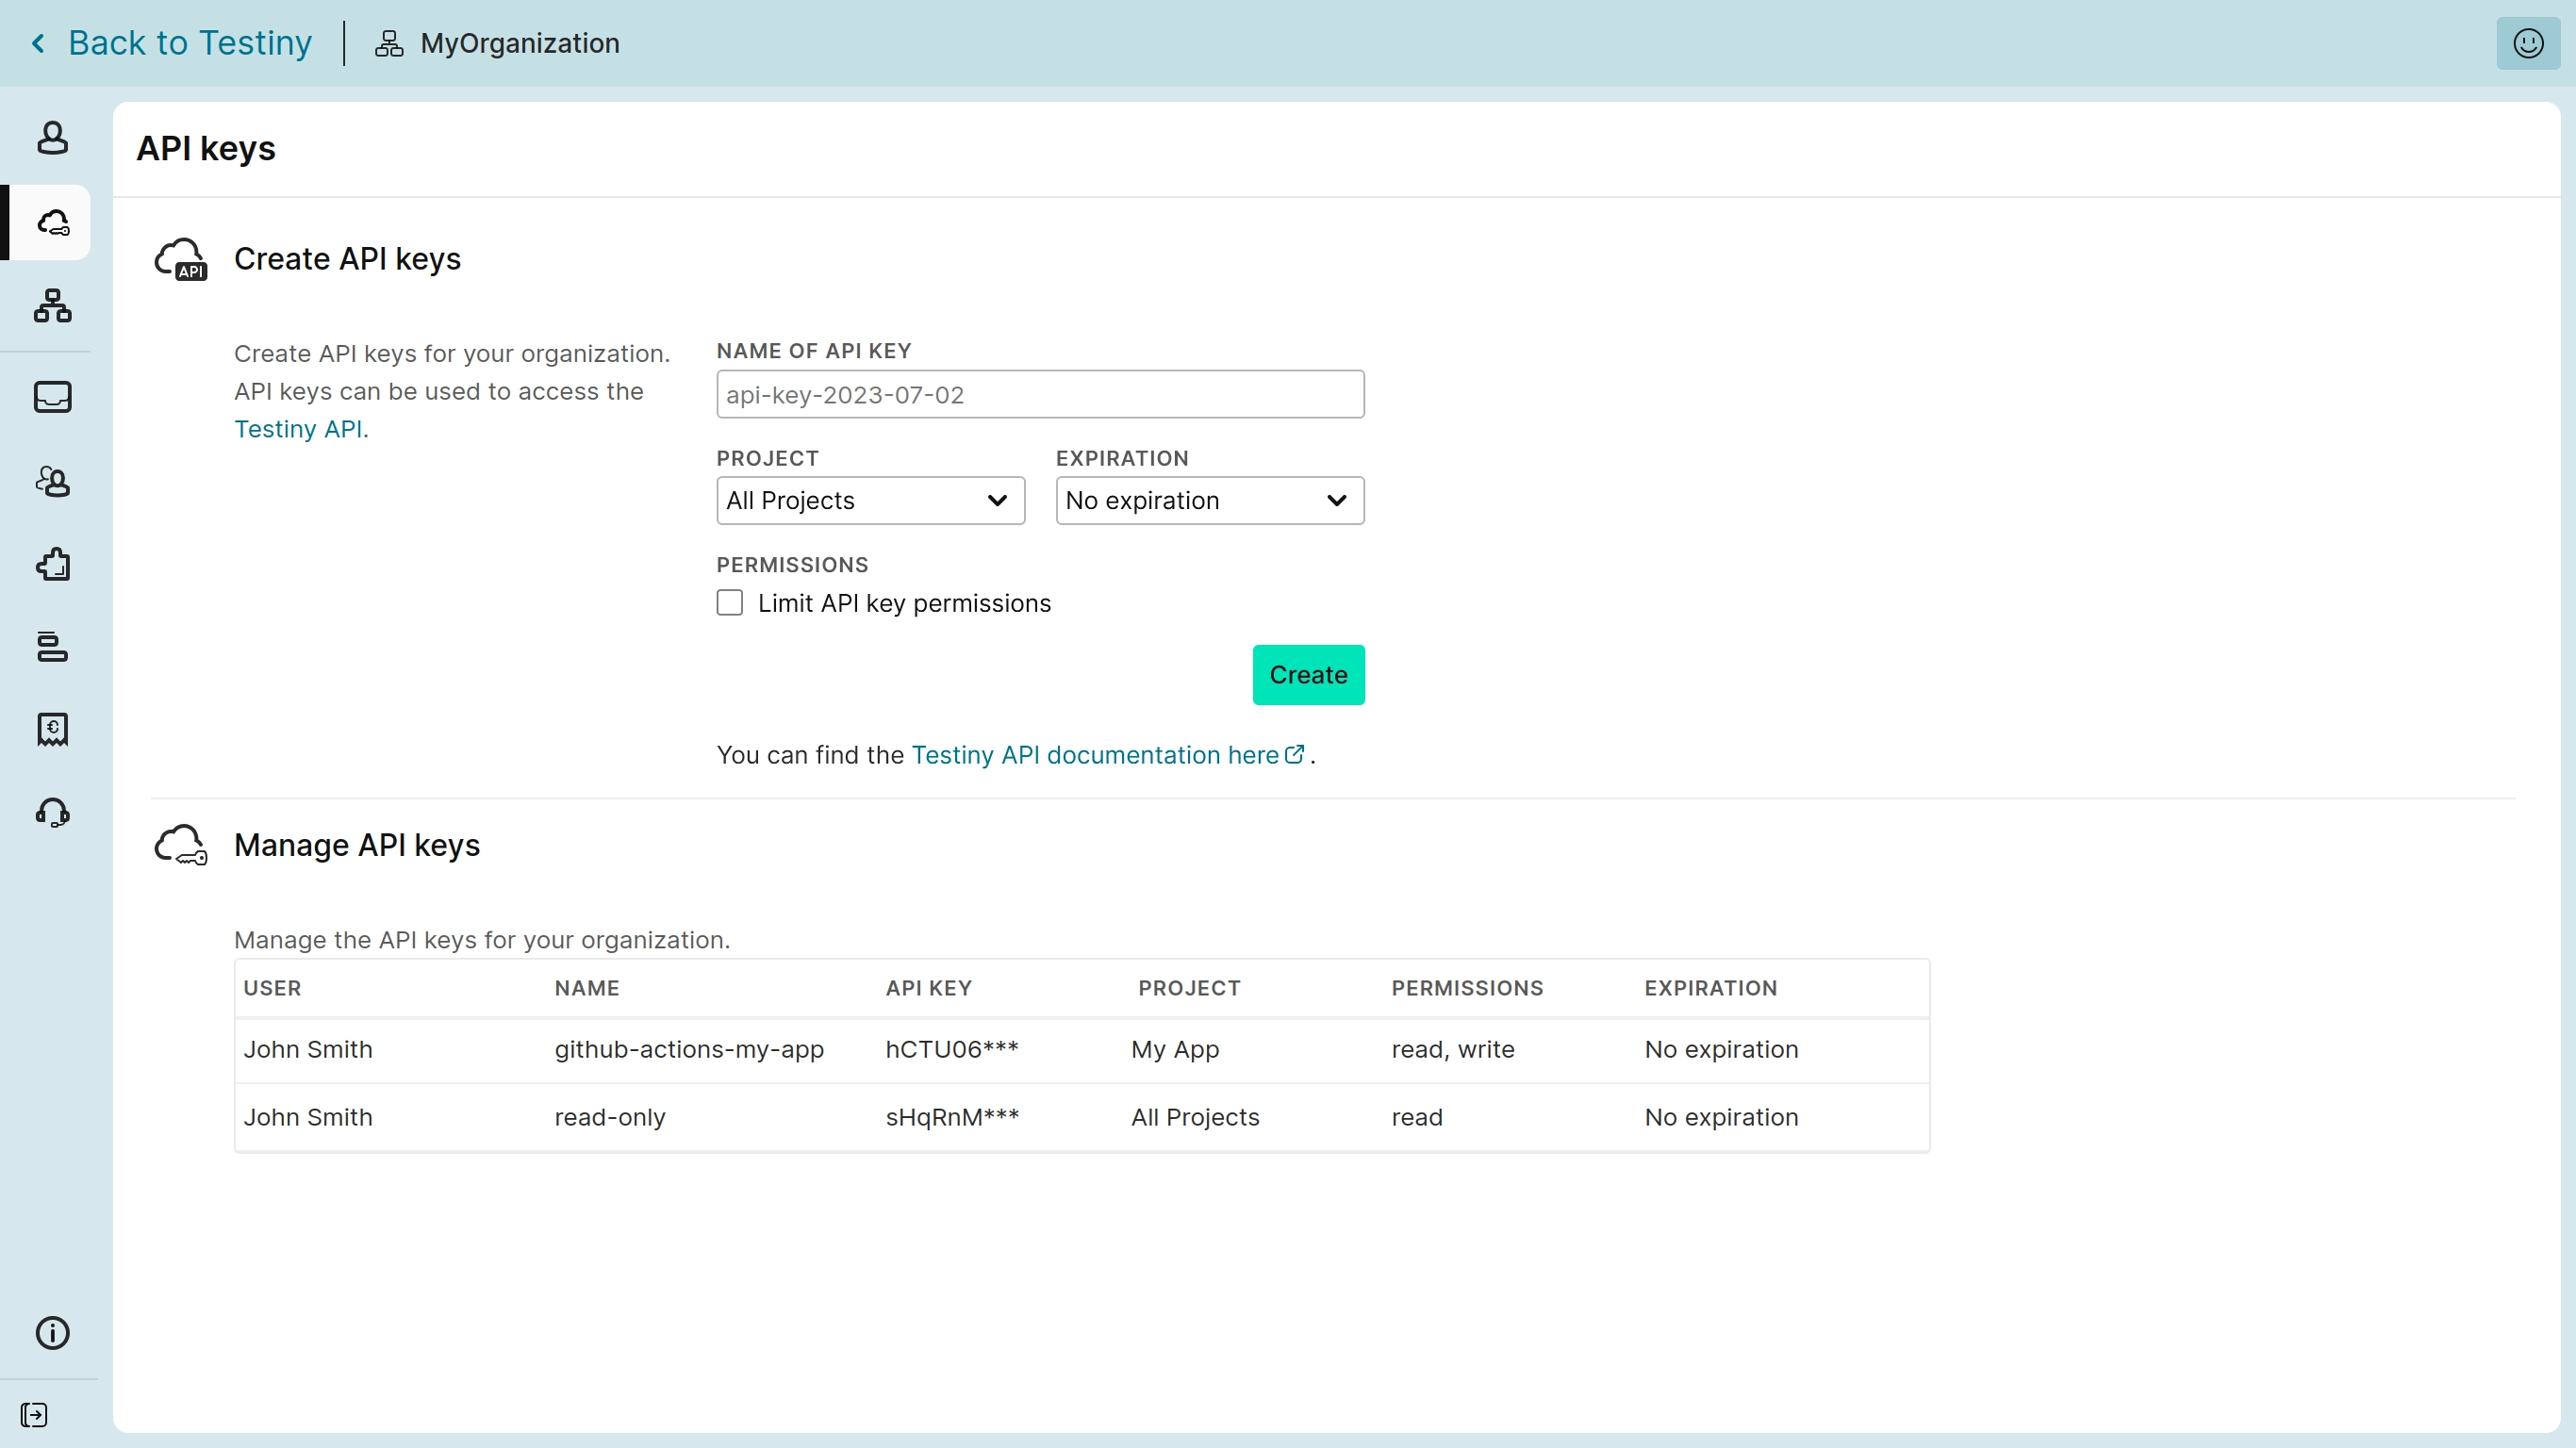
When creating an API key you have the following options (all of those are optional):
-
Name
Specify a meaningful name for the API key (e.g. api-key-ci) that identifies where the API key will be used. -
Project
You can select "All projects" or a single project for which the API key is valid.
Selecting "All projects" gives the API key access to all projects that the user has access to. For example, if a user only has access to one project, the API key will only have access to that project. When the user's access to this project is removed, the API key also loses access. -
Expiration
The expiry date of the API key can be set to 7 days, 30 days, 90 days, 1 year or no expiration date. -
Permissions
By default, an API key inherits the same permissions as the user who created it. If you check theLimit API key permissionsbox, you can restrict the key’s permissions by assigning it a specific role (e.g. Run Executor or Viewer). In addition to built-in roles and user-defined roles, there are also roles for importing data (e.g. "Automation Importer" for importing automation data). The API key will only have the lowest level of access between your permissions and the role you assign.
If you don’t specify any option, an API key with a name containing the current date will be created — e.g. api-key-2022-11-01.
The created API key is valid for all projects, does not expire and has the same (read/write) permissions as the user creating the API key.
Please note that even an API key with "Administrator" permissions cannot perform some administrative actions, such as changing organization settings or deleting the organization.
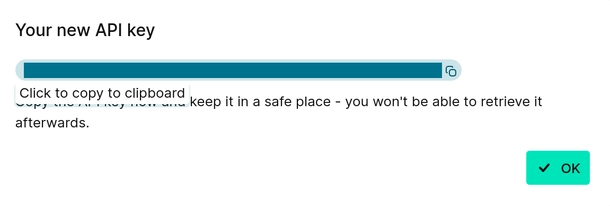
Copy the API key from the dialog after creating it:
 |
|---|
Important: Copy the API key from the dialog — you will only see this dialog once. If you forget to copy the key and close the dialog too early, you’ll have to create a new key.
Once created, API keys cannot be modified. If you need different permissions or a different expiration time, you will need to create a new API key.
Managing and deleting API Keys
Users with the role "Administrator" can see and manage all created API keys for the organization. Other users can only see and manage their own API keys.
All existing API keys are listed in the table. Expired API keys are kept and visible in this table.
To delete an API key, click the ![]() icon on the row of the key.
icon on the row of the key.