Migrating from Xray to Testiny
This guide shows how to migrate test cases from Xray to Testiny. We recommend using our importer that uses the Xray API, where you can migrate test cases including attachments, custom field values, text formatting and linked Jira requirements. Both Xray for Jira Cloud and Xray for Jira Data Center/Server are supported.
Alternatively, you can export your Xray test cases as a CSV file and import that, but this method does not migrate images or attachments.
Migrate via Xray API
Testiny supports the migration via Xray API so that you can migrate your test cases including images and attachments, as well as custom field values, text formatting and linked Jira requirements. The importer works with both Xray for Jira Cloud and Xray for Jira Data Center/Server. Follow these steps to migrate your tests per project:
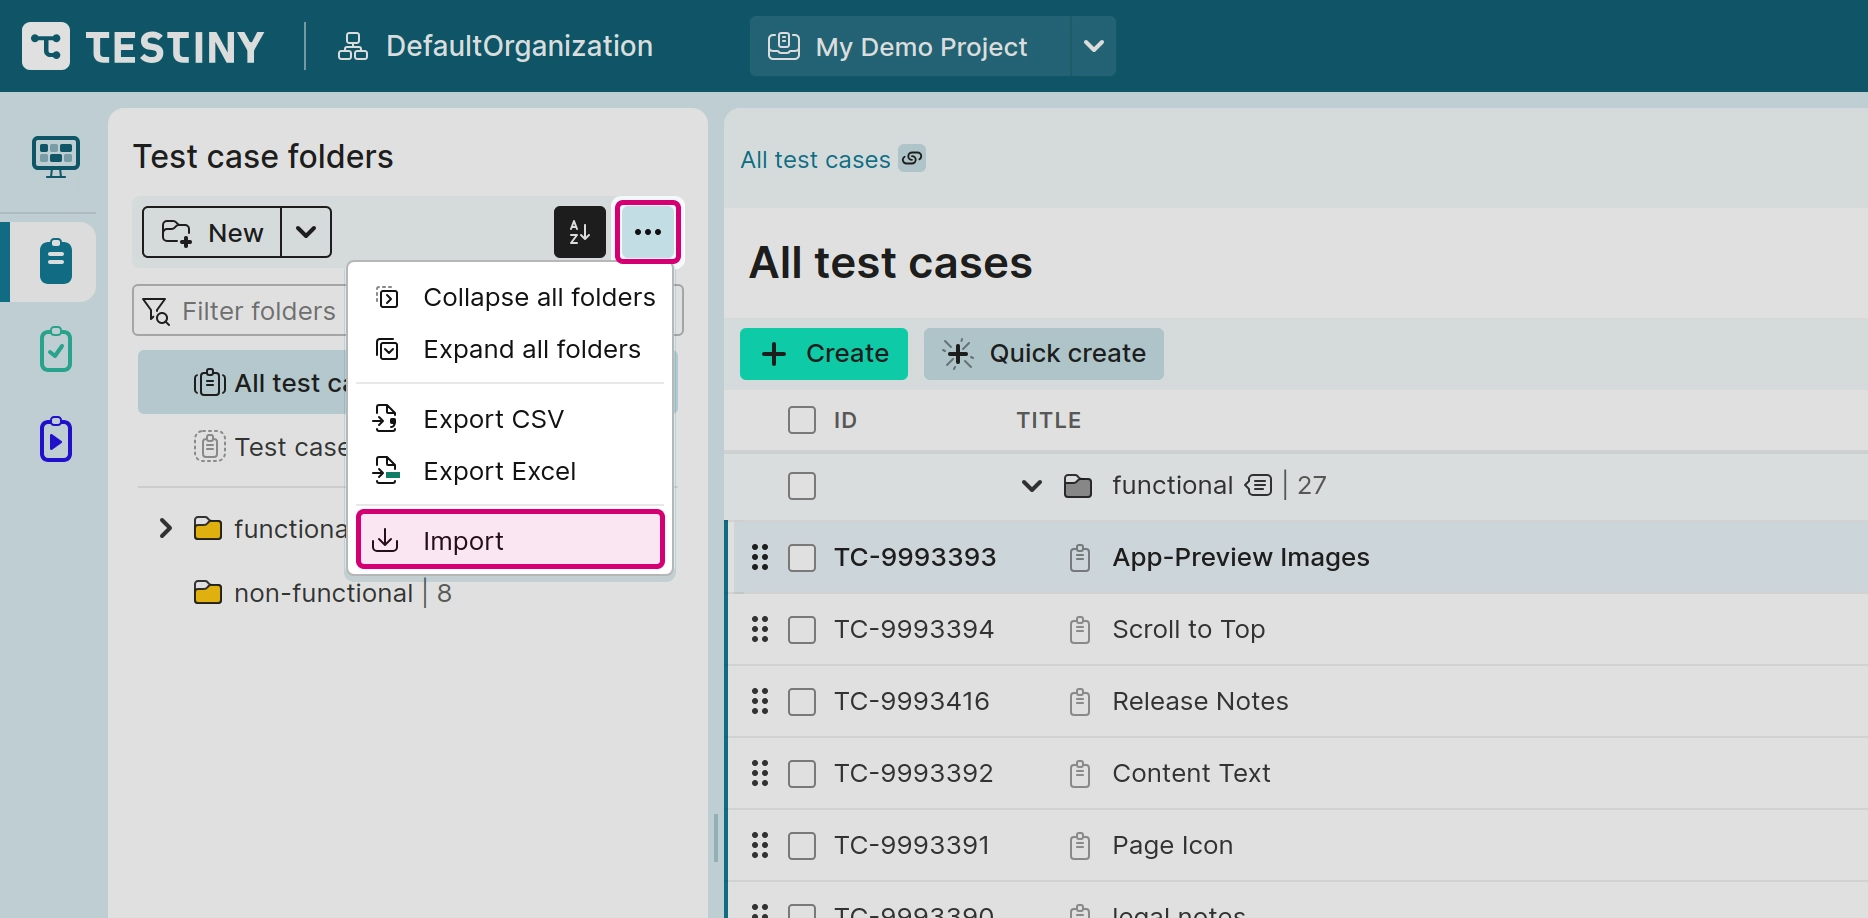
- Go to the test cases in your Testiny project and choose 'Import' from the menu as shown in the screenshot below.
- Choose the option
Xray API.

- Select your
Xray product typeand enter your Xray credentials, then clickConnect. Depending on the product type, the importer asks for different credentials.
-
Xray for Jira Cloud — provide the Jira instance address (your
https://<your-domain>.atlassian.netURL), the email address of your Jira user, a Jira Cloud API token, and your Xray Cloud Client ID and Client Secret.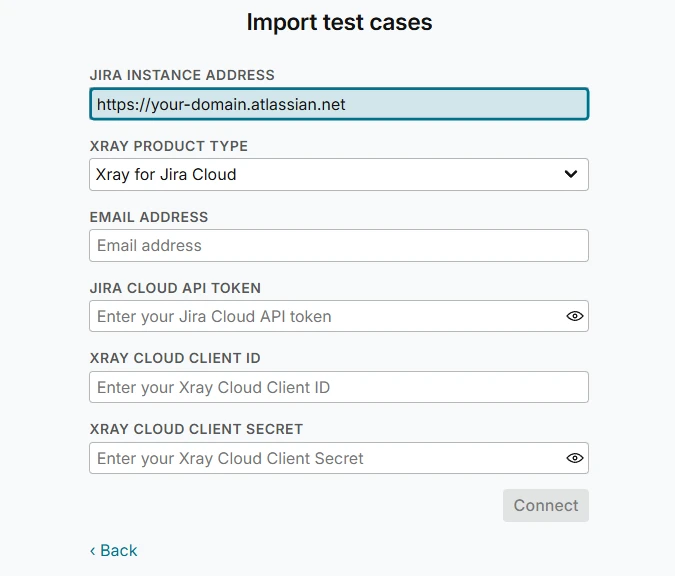
-
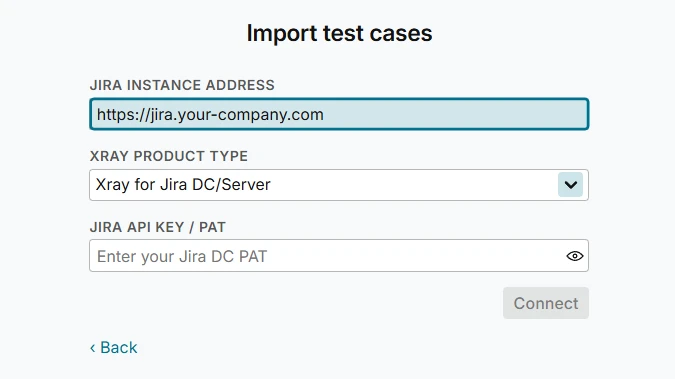
Xray for Jira Data Center/Server — provide the Jira instance address (the URL to your self-hosted Jira instance) and a Jira API key / personal access token (PAT).
Where to get the credentials:
- Xray Cloud Client ID and Client Secret — generate an API key in Xray's global settings under API Keys.
- Jira Cloud API token — create one in your Atlassian account security settings.
- Jira API key / PAT (Data Center/Server) — create a personal access token in your Jira profile.
Please note that the Jira/Xray instance must be publicly reachable so that Testiny can send API requests and migrate the data.
-
After connecting, you can now import your existing test cases:
- Choose from which Jira project you would like to import the test cases.
- If you just want to try the migration, you can also set a limit to only retrieve a small number of test cases.
-
After selecting a project, Testiny retrieves the test cases from Xray. Click
Map fields automaticallyto align the fields from your Xray test cases with the fields in Testiny.
You can optionally map custom fields as well — if a custom field from Xray does not already exist in Testiny, you can create it during the mapping. Once the mapping is confirmed, you get a preview of the test cases that will be imported. For further information about general importer settings, refer to the Importer Settings. -
Finally, if there are no errors and you're satisfied with the preview, click
Importto finalize the import and add the test cases to your project.
A summary dialog appears after the import, showing detailed statistics and any error messages. Copy the data to the clipboard (Copy all data to the clipboard) or dismiss the dialog by selecting eitherSave summary and close(this action downloads an HTML report of the import) or justClose.
Migrate via CSV
Testiny also supports importing test cases from a CSV file exported from Xray. While Xray supports exporting data in various formats, this method aligns with Testiny's CSV import.
Xray's CSV export does not include images or attachments, so these cannot be migrated this way. To migrate images and attachments, use the Xray API instead, or add them manually after the import.
Export test cases from Xray
To export your test cases from Xray in CSV format, follow these steps:
- In Jira, navigate to the 'Issues' tab where your Xray test cases are listed.
- Use Jira's built-in export feature to export the issues to CSV. Choose 'Export' and then 'CSV (all fields)' to ensure all data related to your Xray test cases is included.
- Save the CSV file to your local system.
Refer to Xray's documentation for more detailed steps: Export Tests using JIRA built-in features.
Import the CSV file into Testiny
After obtaining your test cases in CSV format, you can import them into Testiny:
- Go to your Testiny project and choose 'Import' from the menu.
- Choose the
CSVimport option and click "Select a file to import" or drag & drop your file into the importer. - Testiny automatically detects the CSV settings and displays a preview of the test cases to be imported. Here, you can map the CSV columns to the corresponding fields in Testiny.
- Adjust any necessary field mappings and resolve issues highlighted during the preview.
- Click
Importto finalize the process and add the test cases to your Testiny project.
Ensure the CSV file structure aligns with Testiny's test case fields. You may need to modify the CSV file if test steps or results are formatted in a way that Testiny cannot parse directly. If you require assistance with formatting your data, please do not hesitate to contact us.